How can you speed up video on Instagram
Trying to speed up a video on Instagram but the speed button is missing? We test Reels and Story workflows on iPhone and Android in 2026 so you can fix speed, audio, and quality fast.
If you want to change video speed on Instagram in 2026, start with Reels. Reels gets the speed controls first and keeps them most consistently. Stories sometimes has speed tools, but many accounts still don’t see a speed button there. If you’re working from your camera roll and Instagram won’t cooperate, you can speed up the video on your iPhone or Android first, then upload.
I’m writing this the way we use it at Zeely: quick, repeatable, and easy to test. You’ll get the cleanest method first, then the workarounds.
How do you speed up a video on Instagram and where is the speed control?
I’m not saying this to be dramatic. Meta keeps improving Reels because it’s a major revenue driver and a core viewing surface. WSJ has covered how central Reels has become to Meta’s business and viewing behavior, which matches what we see in the app: the Reels editor gets the most editing features first.
Here’s a quick decision box you can follow without overthinking:
- Reels: yes, speed control is usually available
- Stories: sometimes, depends on your account and rollout
- Camera roll: yes, if you speed it up before you upload
Where is the speed control on Instagram?
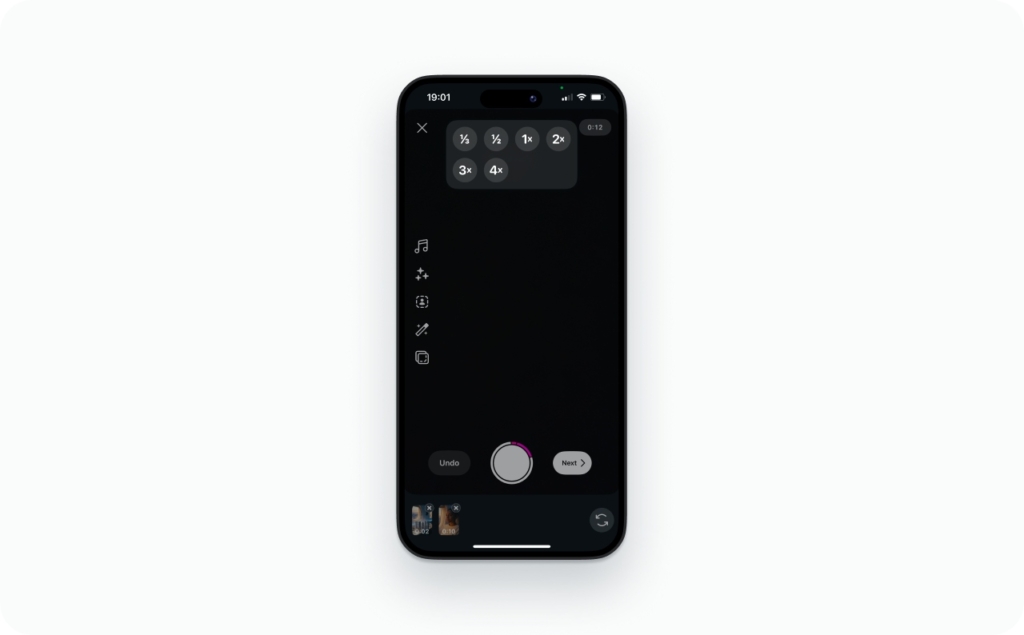
In Reels, speed controls show up in two common places.
- First, while you’re recording, you’ll usually see a 1x control on the Reels camera screen. That’s where you can pick 2x or 3x before filming.
- Second, when you’re editing, speed is often applied clip-by-clip. That means you tap a clip in the timeline, then choose a speed option for that clip.
In Stories, speed controls are not dependable. Some accounts see them. Many don’t. So if your goal is to speed up an Instagram Story video, the fastest solution is usually to speed it up in a Reel draft first, then post to Stories.
What does playback speed mean on Instagram?
When you speed up a video, three things happen immediately.
- The clip gets shorter. That’s great when you’re trying to fit a long video into a Reel without cutting the point.
- Motion becomes more intense. Hands can look efficient. Faces can look chaotic. This matters if you’re filming yourself talking, or doing close-up work like makeup, nails, or cooking.
- Audio usually changes. Voices can sound higher, and music can drift off beat if you placed it before changing speed. Captions can also feel “late” because the pacing shifts.
Decide your speed first, then build audio and captions after. It saves you rework.
What speed options should you expect?
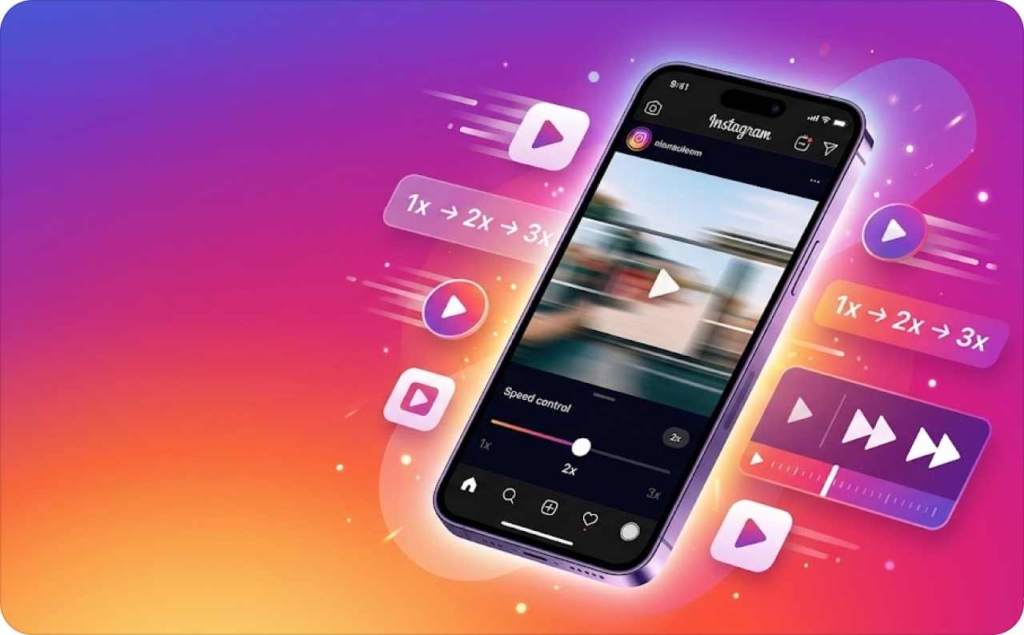
Most accounts see a small set of speed choices, often including 0.3x, 0.5x, 1x, 2x, and 3x. Some accounts see different menus because Instagram tests features by account.
Even if your speed menu looks different, the workflow is still the same. You either set speed before recording, or apply speed to a clip while editing.
How do you speed up a Reel while recording?
If you’re filming right now, this is the cleanest method. Instagram records the clip at the selected playback speed, so it stays stable in the timeline.
Do this now:
- Open Instagram and tap the plus sign to create
- Choose Reel
- Look for the 1x speed control on the recording screen
- Tap it and choose 2x or 3x
- Record your segment
- Tap Next and continue editing
Check this before you hit record: if you don’t see a speed control on the recording screen, you may be in the Stories camera or a different creation mode. Switch back to Reel creation.
Here are use cases where speeding up actually makes the video better, not just faster. Think timelapse-style cleaning, cooking prep, packing orders, restocking shelves, and tutorials with dead time. Speed removes waiting, and your viewer feels like you respect their time.
One warning that saves you: 3x on faces can look jittery. If you’re talking to camera, start with 2x, or keep the talking parts at 1x and speed up only the repetitive segments later.
Meta’s own newsroom notes that creation is speeding up, including that nearly 10% of daily Reels views come from content made in Edits. That tells you the direction of travel in 2026: faster creation and faster editing.
How do you change speed before recording?
Use this simple rule. It works for most small business content.
Use 2x when the viewer needs to read what you’re doing. Hands, faces, product demos, anything with detail. A bakery icing a cake looks good at 2x. A nail tech doing precise work also looks better at 2x.
Use 3x when the action is repetitive and the viewer just wants momentum. Packing orders, cleaning a counter, stocking shelves, folding shirts.
How do you change speed mid-recording?
You can change speed between segments. This is a great way to keep your Reel watchable:
- Choose a speed before recording segment one
- Record segment one
- Tap the speed control again and choose a new speed
- Record segment two
- Repeat for each segment
Only change speed at a natural break. End of a step, end of a sentence, end of an action. If you switch mid-gesture, it looks like a glitch, not a choice.
How do you keep fast footage stable and not shaky?
Speed makes small shakes look bigger. So you want the footage steady before you speed it up.
- Lock focus and exposure by pressing and holding on your subject
- Brace your elbows against your body
- Step back a little and use a wider view if you can
- Keep movements smooth and slow, even if the video will play fast
How do you speed up an imported video from your camera roll in Instagram?
This is the most common situation I see. You filmed something earlier, it feels slow, and now you want to fast forward Instagram video without opening five apps.
Here’s the key concept. In 2026, Instagram speed changes for imported videos often work best clip-by-clip. That means you may need to split the video into smaller parts, then apply speed to the parts that drag.
Do this now:
- Tap plus sign, choose Reel
- Import your camera roll video
- Add it to the timeline
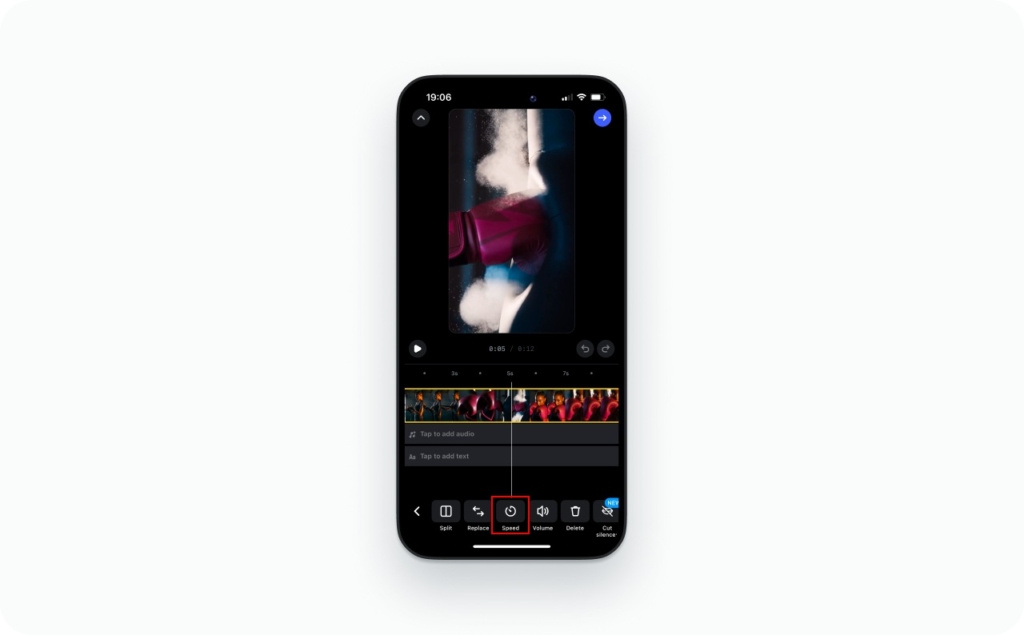
- Tap the clip so it highlights
- Look for the speed tool for that selected clip
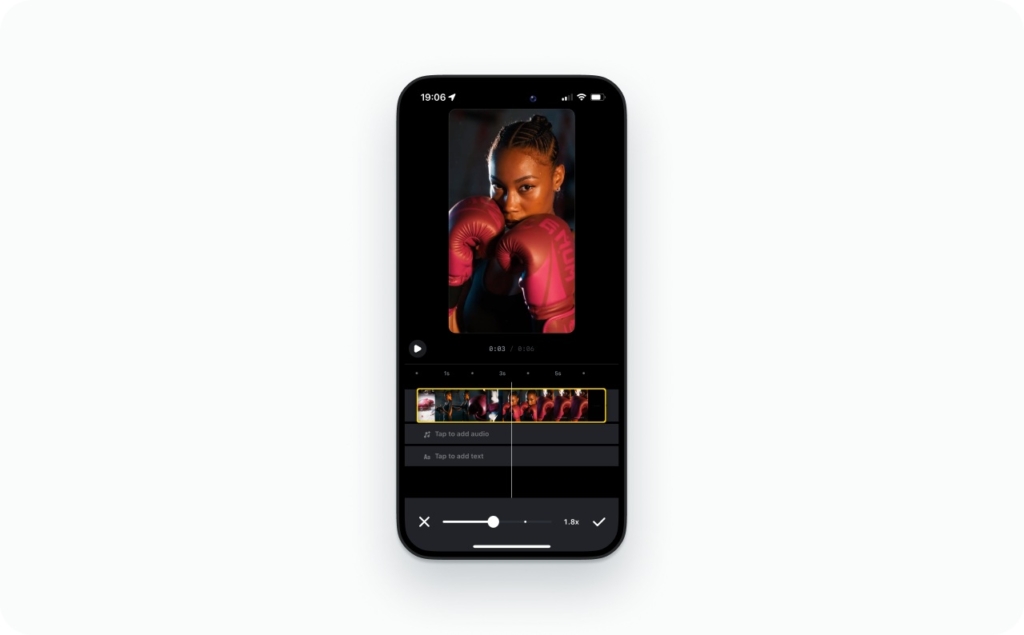
- Choose 2x or 3x and preview from the start
What you should see: the clip shortens when you increase speed. If nothing changes, you may not be applying speed to a selected clip.
Troubleshooting:
- If speed is greyed out, start a fresh Reel draft and try again
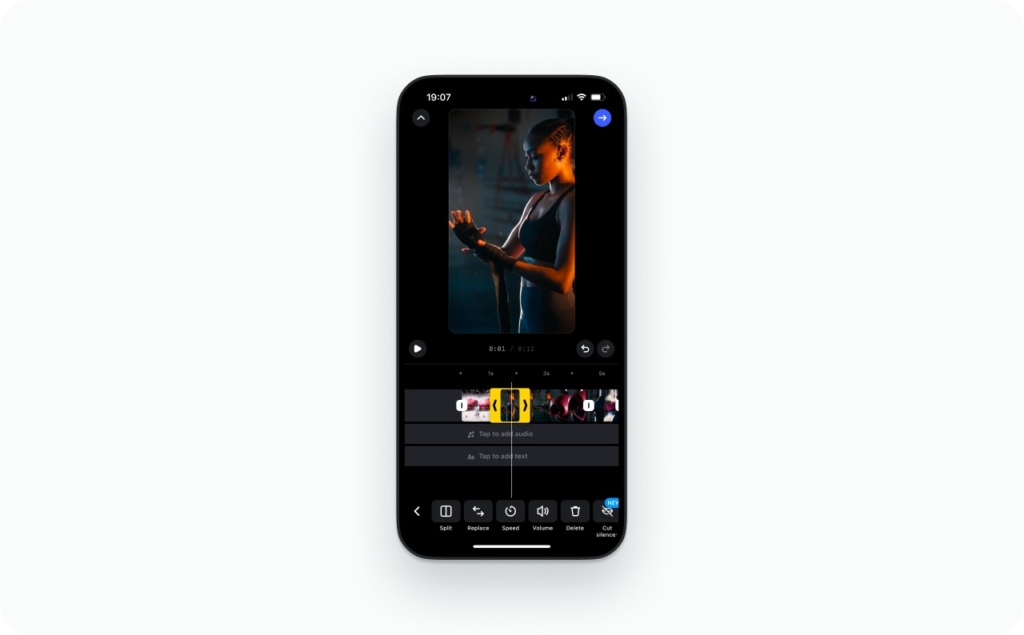
- If one long clip is hard to edit, split it first
- If audio drifts, remove original audio and re-add music after speed edits
Can you speed up only part of a video?
Yes, and it’s the best way to keep your Reel watchable.
Here’s why. If you speed up everything, you often lose the parts that build trust. A close-up of the final product is worth keeping at 1x for a moment. The waiting, walking, and repositioning is not.
Do this now:
- Split the video where the action changes
- Keep key moments at 1x
- Speed up the slow parts at 2x or 3x
Where to split:
- Sentence breaks if someone is talking
- Step changes if it’s a tutorial
- Beat changes if you’re using music
How do you fit a long camera-roll video into a Reel without losing the point?
If your camera roll video is long, don’t rely on speed alone. Use speed plus simple cuts.
Here’s a method that works for service businesses and product sellers.
Start with one clear “proof” shot at normal speed. Then speed up the repetitive work. End with the result.
Example for a small shop packing orders:
- 2 seconds at 1x showing the product label
- 6 seconds at 3x showing packing
- 2 seconds at 1x showing the finished box and thank-you note
If you’re tempted to keep everything, your viewer won’t. Keep the story, not the footage.
How do you speed up a video for Instagram Stories if Stories doesn’t show a speed button?
If you’re searching “how to speed up a video on Instagram story,” this is probably your issue. You open Stories, you look for speed, and it’s not there.
That’s normal in 2026. Stories tools roll out unevenly. So the fastest fix is to speed it up in Reels, then post it to Stories.
You have two solid workflows. One stays mostly inside Instagram. One uses an app, which can be better for quality.
How do you speed up a Story video using the Reels workaround?
Do this now:
- Create a Reel draft
- Import or record your clip
- Apply the speed change in the Reels editor
- Save the draft
- Share the sped-up clip to your Story, or save to camera roll and post as a Story
The save draft step matters. If you speed it up, then back out, you can lose the change. You can also repost a speed-up video to your story.
How do you speed up a Story video with an app?
If you want the cleanest result, speed it up before it hits Instagram. This is also helpful if you’re trying to speed up video on iPhone and keep it looking sharp.
Check this export baseline:
- 1080 by 1920, vertical
- Keep the frame rate consistent
- Export at high quality
- Avoid exporting multiple times
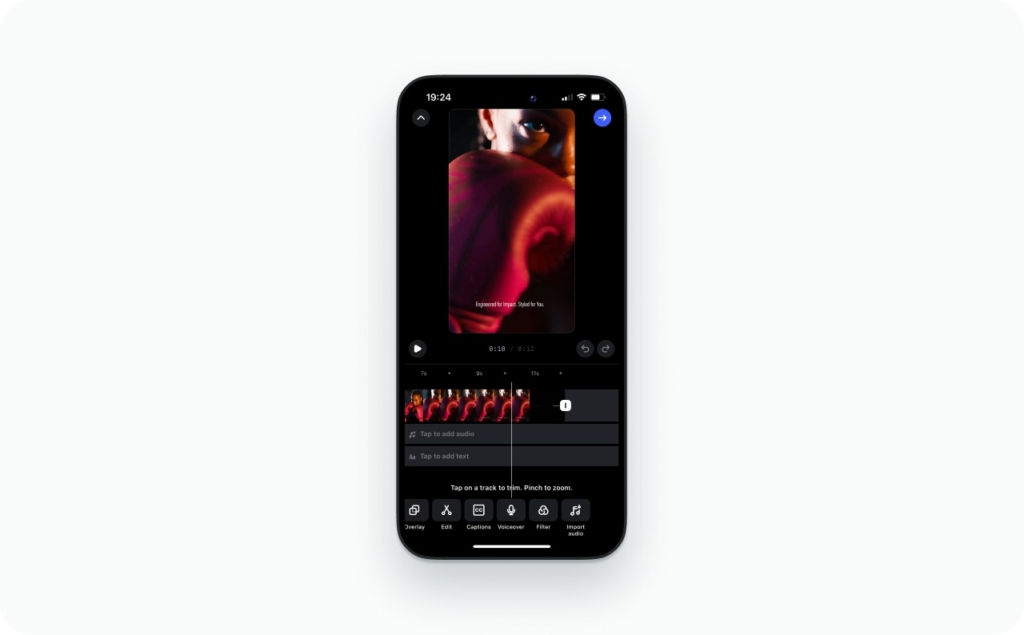
If you’re editing text, music, or templates too, use my full guide to edit Instagram Stories.
Why is the Instagram speed option missing and how do you fix it?
When the speed option disappears, most people assume Instagram removed it. Usually, it’s one of these situations.
You’re in Stories, not Reels. Or the app is stuck after an update. Or your account is in a different rollout group than your friend’s account.
Start with the simplest explanation. If you’re in Stories and you can’t find speed controls, switch to Reels. If you need it for Stories, use the Reels workaround you just read.
Is it missing because you’re in Stories and not Reels?
This is the most common reason, and it’s the easiest fix.
Stories creation often won’t show speed tools. Reels creation is where speed is meant to live.
Once you move to Reels, the speed control shows up again.
Could it be an account rollout or A/B test?
Yes. Instagram tests features by account.
If speed works on one account but not another on the same phone, that’s a rollout sign. The fix is not hunting harder. The fix is using Reels as the editing surface, then posting where you need.
How do you fix audio, sync, and quality issues after speeding up an Instagram video?
Speeding up is easy. Speeding up cleanly is where people get stuck.
I see three issues after a speed change:
- Voices sound higher than normal
- Music goes off beat
- Video looks blurry or jittery after posting
Also, a confusing one: the draft looks fine, but the posted version looks worse. That’s almost always Instagram re-encoding your upload. If your file is already compressed from multiple exports, the posted version can look softer.
Here’s how to fix each issue without turning this into a full editing course.
Why does audio sound higher after speeding up?
When you speed up a clip, Instagram often speeds up the audio too. That’s why voices can sound like a chipmunk.
Do this now:
- Apply your speed edits first
- If the voice sounds wrong, remove the original audio
- Add voiceover after the speed change, or use music instead
Place music after speed edits. If you place music first, then change speed, you often create sync problems.
How do you fix music that goes off-beat after changing speed?
Music goes off-beat because speed changes shift timing. The fix is to set timing, then place music.
- Finalize speed for each clip
- Trim clips on beat points
- Add music last
- Nudge the music start so the first visible action hits on the downbeat
Keep one speed setting per clip when possible. Multiple speed changes inside one clip make timing harder.
Why does your sped-up Reel look jittery or blurry?
Jitter usually comes from low light, shaky filming, or repeated exporting. Blur usually comes from compression.
Do this now:
- Film in good light
- Keep the camera steady, especially for close-ups
- Export once, then upload
- Turn on Instagram’s upload highest quality setting
If your connection is weak, uploads can compress harder. Upload on Wi-Fi when quality matters.
Posting checklist and what to track
My own checklist:
- I used the Reels editor for speed
- I applied speed per clip, then previewed from the start
- I split long clips before speeding them up
- I removed original audio if pitch sounded wrong
- I added music after speed edits
- I exported once and uploaded the highest quality version
- I watched the posted version, not only the draft
If you’re not satisfied with Instagram’s built-in options for speeding up videos, you can try using an AI Reel maker instead. With the right prompt, AI can speed up your footage while keeping the motion natural and smooth, without the glitches or awkward jumps that sometimes happen on Instagram. It also gives you more control over pacing and overall quality. In many cases, generating the sped-up clip with AI is actually faster and more efficient than editing it directly in the Instagram app. Read now about AI Reel Maker and see how it can liven up your videos smoothly while saving you time on editing.
FAQ
Yes. In 2026, the most reliable speed control lives in the Reels editor. You can speed up while recording, or speed up a clip in editing. Stories often lack the button, so use the Reels workaround instead.
Usually, yes, but only inside a Reel draft. Open the draft, tap the clip, then look for the speed control tied to that clip. If your Reel is already posted, you’ll need to duplicate and re-edit.
Yes, if your video is split into clips. Speed is applied per clip in the Reels editor, not as one global setting. I recommend splitting at natural beats, then speeding only the slow segments to keep faces readable.
It varies by account test, but you’ll typically see options like 0.3x, 0.5x, 1x, 2x, and 3x. Faster speeds are best for timelapse moments. Use 2x for talking hands, and 3x for repetitive actions often.
Yes. Speeding up shortens the final runtime, which helps long clips fit inside Reels limits. The tradeoff is fewer frames for captions and gestures. After you change speed, recheck auto-captions and any on-screen text timing.
Record or import the clip into Reels, apply speed there, then share that Reel draft to your Story. If you need more control, speed it up in an editor like Edits or iMovie first, then upload the result to Stories.
Instagram usually speeds the audio with the video, so voices can sound higher. The fix is to remove original audio and add a fresh voiceover or music after the speed change. External editors can also preserve pitch better.
Slow-down works best in Reels while recording, when the speed picker shows options below 1x. If you’re working with an imported clip, slow motion can look choppy unless the original was shot at a high frame rate, like 60fps.

Emma blends product marketing and content to turn complex tools into simple, sales-driven playbooks for AI ad creatives and Facebook/Instagram campaigns. You’ll get checklists, bite-size guides, and real results, pulled from thousands of Zeely entrepreneurs, so you can run AI-powered ads confidently, even as a beginner.
Written by: Emma, AI Growth Adviser, Zeely
Reviewed on: March 16, 2026