A step-by-step guide on how to post a Reel on Instagram in 2026
How to post a reel on instagram in 2026 on iPhone, Android, or PC without blurry quality, missing music, or wrong audience settings. I built this using the latest Reels updates, then turned it into a troubleshooting-first playbook.
How to post a reel on Instagram: tap +, choose Reel, then record or upload from your camera roll. Trim clips, add music, add text and auto-captions, then pick a cover that reads on your profile grid. Write a keyword-rich caption, tag people and a location, choose feed and grid placement, set your audience, and tap Share. On PC, upload with Instagram Web or a scheduler, then publish or schedule. If music is missing, check licensing and account type, then use original audio or royalty-safe tracks.
I’m going to start with the fastest publish path from your camera roll. Then I’ll cover PC posting, scheduling, boosting, and the fixes for blurry uploads and missing audio.

Reels in 2026: what has changed and why it matters
Reels distribution is more recommendation-first, so watch time and saves matter fast. Instagram is also testing new feed controls, which changes what people see day-to-day. That means the same Reel can land differently week to week. You need to choose placements and audience settings on purpose, not on autopilot.
Use this quick decision tree before you create anything:
- Reel: best for discovery in the Reels tab and Explore/Suggested
- Story: best for quick updates to current followers
- Feed video: best when your grid post is the main goal
Where a Reel can show:
- Reels tab
- Explore/Suggested
- Home feed
- Profile grid
- Facebook cross-post surfaces
Where your Reel appears
Two toggles decide most of your reach and profile look.
Share to feed puts the Reel into your followers’ home feed. Turn it on when you want a stronger first push. Turn it off when you want the Reel to live mainly in the Reels tab.
Show on profile grid controls whether the cover sits on your grid. Turn it on when the cover is readable and on-brand. Turn it off for test content or time-sensitive posts.
One more setting to respect: account type. A creator account and business account can get different music options due to licensing. If audio is missing, don’t fight the app. Swap to original audio or a royalty-safe track and keep moving.
Video made with Wan 2.5 and Zeely.
Now you can create fashion videos, product videos, UGC, and full product ads without setting up a shoot.
Swap faces to any model, change environments, and reuse the same product across formats in just a few clicks.
What really matters is how… pic.twitter.com/2MftkzUfam
— Zeely AI (@zeely_ai) December 27, 2025
Instagram Reel specs and requirements
Use this table before you post. If one row is off, that’s usually why quality drops or cropping happens.
| What matters | Use this | Why it matters |
| Max length | Up to 3 minutes | Longer Reels stay native after the 2026 update |
| Aspect ratio | 9:16 (vertical) | Prevents side cropping and black bars |
| Resolution | 1080 × 1920 | Avoids blurry playback |
| File type | MP4 or MOV | Instagram’s preferred formats |
| Video codec | H.264 | Best balance of quality and size |
| Frame rate | 30 fps | Keeps motion smooth and stable |
| Audio | Original or licensed | Business accounts have music limits |
Instagram expanded Reels to three minutes in 2026, making long vertical video a first-class format. Read more about Reels dimensions and aspect ratio.
Upload quality checklist
| Check this | Why |
| Upload on Wi-Fi | Cellular uploads compress more |
| Turn on “Highest quality uploads” | Preserves detail |
| Avoid reposted watermarks | Triggers extra compression |
| Export once at final settings | Re-exports degrade quality |
Rules for export, Story behavior, and text placement
Use an AI reel maker or export your video in 9:16 at 1080 × 1920, using H.264 in an MP4 file with a medium-to-high bitrate and AAC audio at 44.1 kHz. This setup prevents compression and keeps your Reel sharp after upload. You can create the video
Short Reels loop easily and pick up fast engagement. Longer Reels need a strong opening seconds hook or viewers swipe. When you share a Reel to Story, Instagram shows a preview with a tap-through. If you want full playback in Stories, upload the video as Story segments or use a link sticker to drive taps. Read now how to repost a story on Instagram.
Keep text clear of Instagram’s UI. Leave space at the top for usernames and menus, and at the bottom for captions and buttons. Make sure cover text still reads when cropped on the profile grid. Read how I create all my videos with Instagram Reels maker.
How to post a Reel on Instagram step by step
Posting a Reel in the app comes down to two clean paths: record inside Instagram or upload a video from your camera roll. Both end the same way. The difference is speed and control. If you already edited your video, upload it. If you’re building on the fly, record in-app.
The core steps
- Open Instagram and tap +
- Choose Reel
- Record a clip or tap Upload to pull from your camera roll
- Trim, reorder, or add clips
- Tap Next
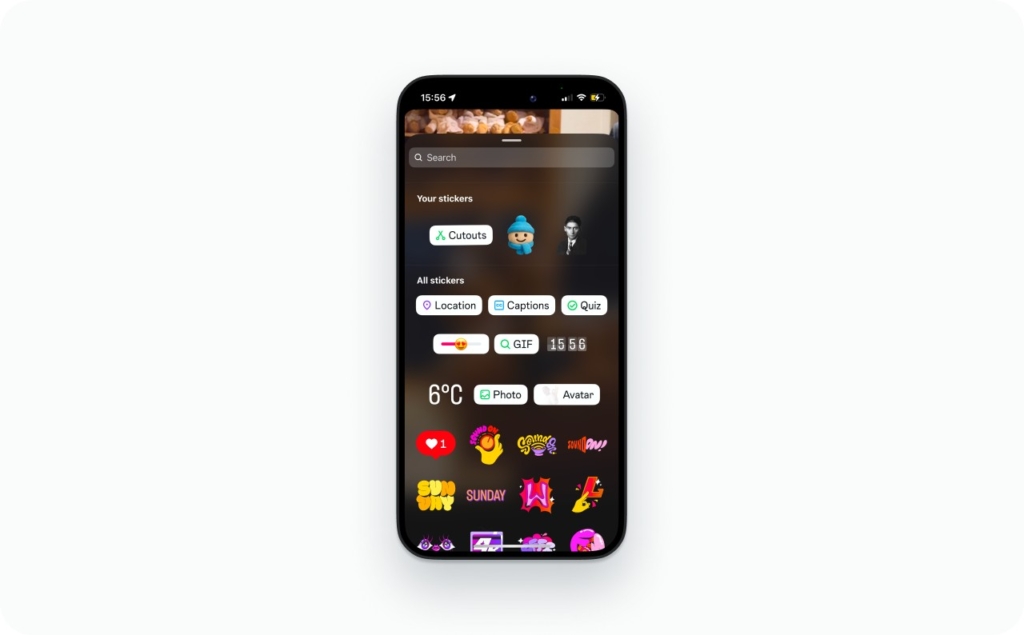
- Add music, text, and auto captions
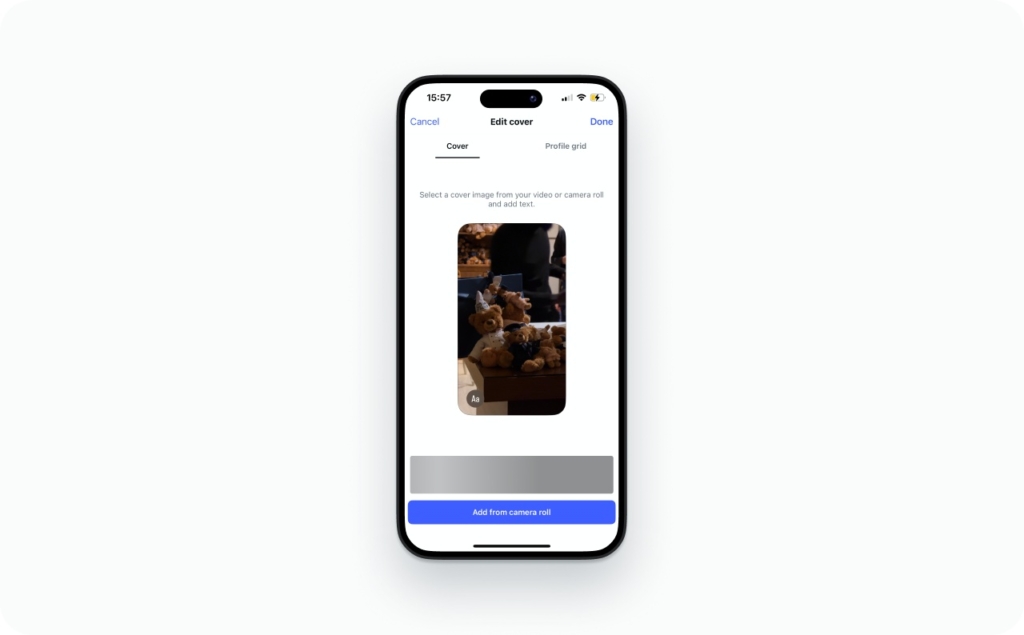
- Choose a cover (frame or upload)
- Write your caption, add hashtags, location, and tags
- Set audience, collaborators, and share to feed
- Tap Share
Cover reads on your grid. Caption includes keywords. People or collaborators tagged. Audience set. Share to feed on or off, intentionally. You may also like to know the best time to post reels.
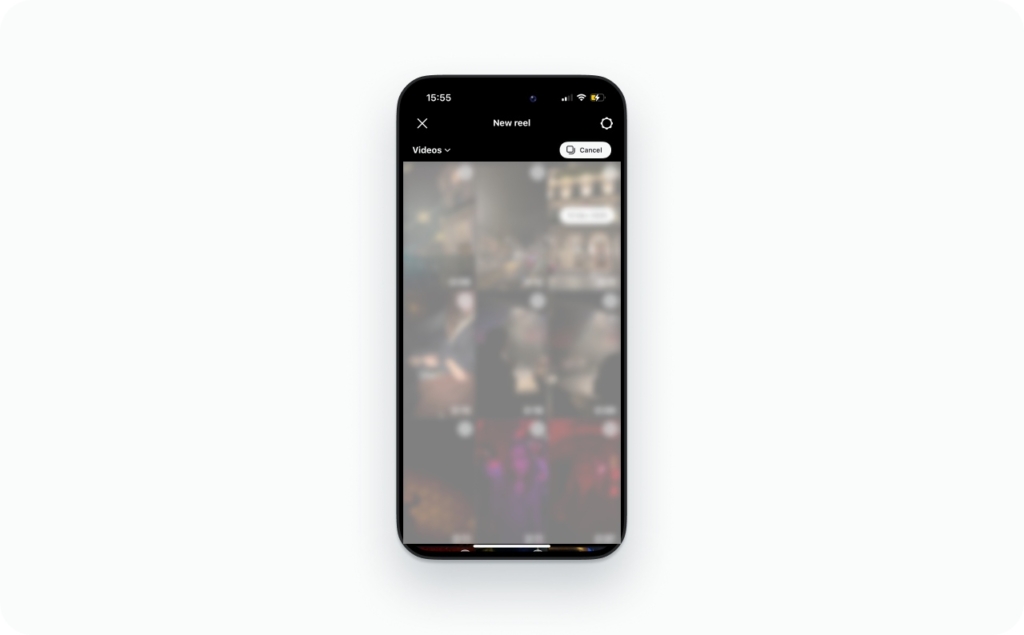
Upload an existing video from your camera roll
This is the quickest way to post polished content.
- Tap + → Reel → Upload
- Select your video from the gallery/camera roll
- Trim the start and end
- Add more clips if needed
- Tap Next and finish captions and cover
- Publish
Common gotchas when you upload a Reel from camera roll:
- Wrong aspect ratio causes cropping
- Muted audio comes from licensing or export issues
- Reposted videos with watermarks lose quality
Record a multi-clip Reel in-app
Tap Record to add clips one by one. You can trim each clip, reorder them, or replace a clip before posting. Nothing is final until you hit Share. This is useful for tutorials, before-and-after videos, or anything built in pieces.
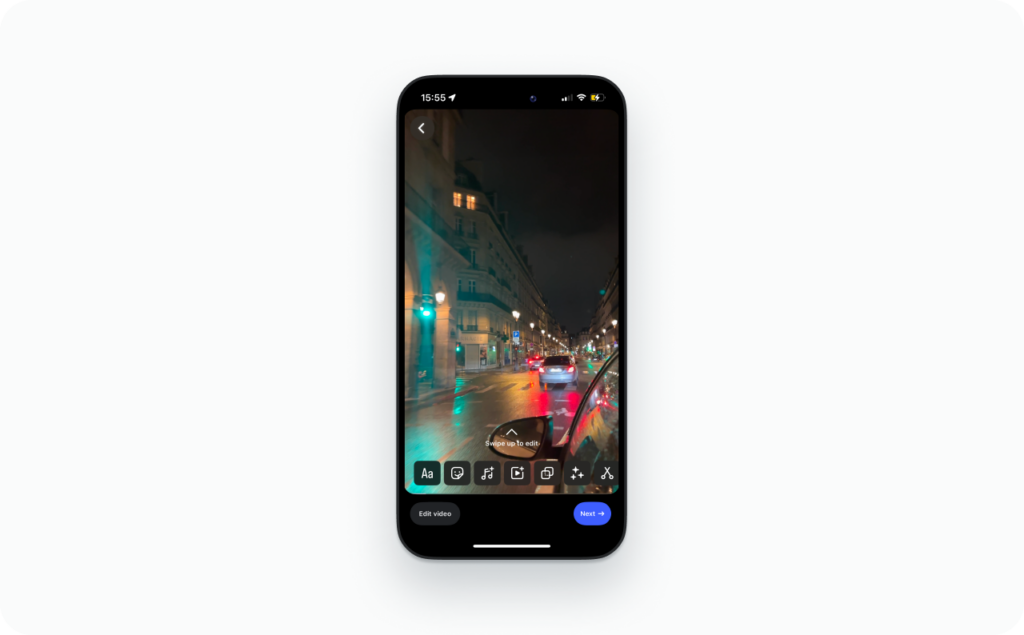
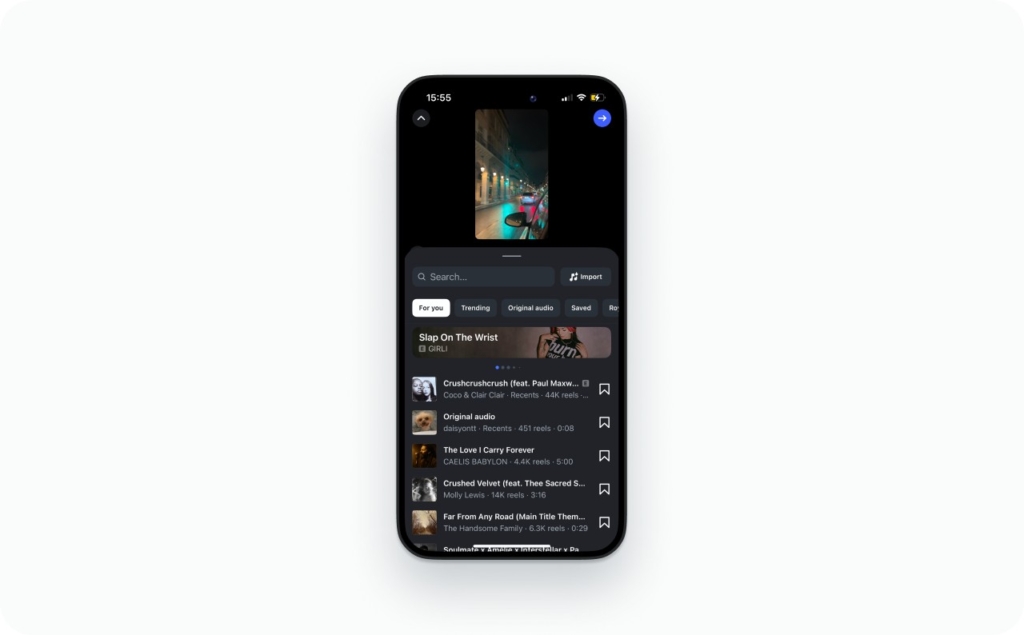
Add music, text, captions, and voiceover
Do this in order to avoid rework:
- Cut the video first
- Turn on auto captions
- Time on-screen text
- Add music and balance volume
- Record a voiceover if needed
If music is missing, it’s often a business account licensing limit. Use original audio or switch tracks. Trending audio helps discovery, but clarity beats trends every time. Read also the complete guide on how to add music to Instagram story.
Editing workflows with photos, GIFs, and better quality that speed up creation
If you feel slow, it’s rarely an Instagram problem. It’s an editing workflow problem. When you batch assets, use templates, and export cleanly, posting a Reel becomes the last 30 seconds of the job.
This is where tools like CapCut and Edits (Instagram) help. Templates and beat sync let you build faster without cutting every clip by hand. Business Insider also noted a quality angle: “Reels made in Edits will also be optimized for higher-resolution video up to 2K resolution.” That doesn’t replace good exports, but it signals where Instagram is heading.
This is the fastest way to learn how to post a photo as a reel on instagram and still look polished.
- Tap + → Reel → Upload
- Switch to Photos and pick 6 to 12 images
- Choose a template or turn on beat sync if it appears
- Adjust timing so cuts hit the music beat
- Pick a cover that reads on your profile grid
Use a clear frame with one headline. Keep it short.
Caption template you can reuse:
“3 mistakes I made with [topic] so you don’t have to.”
Then add one keyword and one location tag.
That’s also how to post a picture as a reel on instagram when you don’t have video content ready.
GIF to Reel
A GIF inside a Reel works, but not the way people expect. GIF files are tiny and get messy when stretched.
Three methods that work:
- Add a GIF sticker inside Instagram (search via GIPHY)
- Add a GIF as an overlay in CapCut or Edits, then export as MP4
- Convert GIF to video first, then upload like a normal clip
Avoid this: uploading a raw GIF as the main file. It usually creates compression artifacts and mushy edges. If you’re searching how to post a gif on instagram reel, the safest path is “overlay, then export.”
Covers, grid placement, drafts, and audience controls
When you’re posting for a brand, the Reel itself is only half the job. The other half is how it looks on your profile grid, how the cover image reads as a thumbnail, and who can see it. Instagram also shifted the profile layout toward rectangles, so covers that looked fine before can suddenly look cramped. As Engadget put it, Instagram is “changing the longstanding square grid on your profile to a rectangular layout.”
If you want to save a reel draft and post later, do it on purpose.
- While editing, tap the X (top left)
- Choose Save draft
- To find it: tap + → Reel → look for Drafts at the top of your camera roll/gallery view
Reels drafts are stored on your device, not safely “in the cloud.” Two things commonly delete them:
- Logging out of Instagram
- Deleting or reinstalling the app
If the question is “where are my reel drafts,” it’s usually one of those two issues.
Design rules for taps
Your cover is your storefront. Treat it like one.
- Readable headline: 3–5 words. Big text. High contrast
- Center the subject: keep your face or product in the middle, not the edges
- Safe-zone spacing: leave breathing room at top and bottom so UI doesn’t cover key text
You can pick a thumbnail from video (select a clean frame), or upload a custom cover if you designed one. For brands, custom covers win when you want a consistent grid.
Grid control matters too. If a Reel is seasonal, experimental, or not on-brand, hide a reel from profile grid so it can still live in Reels without reshaping your grid.
Audience settings for Close Friends, followers, limits
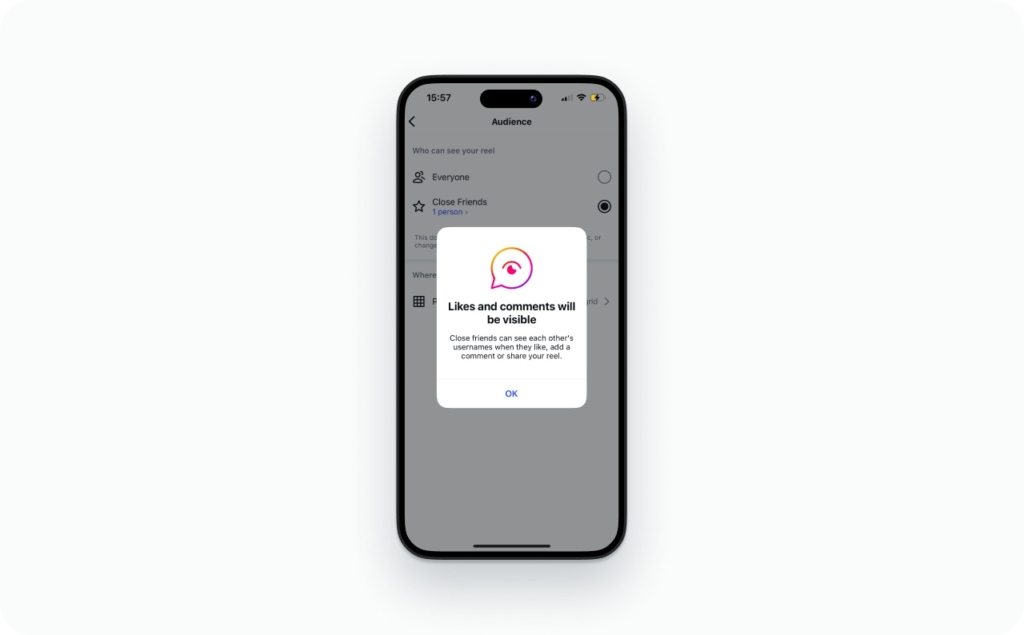
Before you publish, set visibility like you mean it.
- Public: best for reach and discovery
- Followers: good for softer launches
- Close Friends: best for offers, behind-the-scenes, and VIP drops
If you need to post a reel privately, a private account is the true “private” mode. Otherwise, audience options can vary by account type, and some music features can differ on a business account.
One more brand move: use collaborators when you want shared reach and shared attribution. A Collab Reel can show on both profiles and combine engagement, which is cleaner than reposting.
How to post a Reel on Instagram from PC
If you’re searching how to post a reel on instagram from pc, here’s the truth: your options depend on whether you need schedule or post now, and whether you need a true Reel or a regular feed video. Read now how to schedule a Story on Instagram.
Method 1: Instagram Web
Use this when you just need to upload from a desktop browser fast. The limitation is real: Hootsuite notes that “the Instagram website doesn’t support publishing Reels and Stories.” Any video you upload here shows as a regular post, not a Reel.
Method 2: A scheduler
If you want a Reel from your computer, use a publishing tool that supports Reels. Hootsuite’s guide spells it out: upload your video in their dashboard and “it will automatically become reels” when it publishes. You can also choose Post now or Schedule for later.
This is the smoothest way to post a video on Reels in Instagram when you edit in Premiere Pro, Final Cut Pro, or CapCut Desktop.
Method 3: Meta Business Suite
Meta Business Suite can also schedule Reels from desktop. Sprout Social’s walkthrough shows the flow: connect your Instagram to your Facebook Page, click Create reel, then hit Next and pick a date and time to schedule.
Export MP4 (H.264) → open your scheduler or Meta Business Suite → upload → paste caption + hashtags + location → pick cover → publish or schedule.
Post a saved Reel
People get stuck here because Instagram uses the word “Saved” in two different ways.
If you mean Saved inside Instagram, that tab is a bookmark folder. It saves other people’s posts for later. It is not a re-upload pipeline, so there’s no magic button for how to post a saved reel on Instagram from that collection.
If you mean a Reel you saved as a file on your computer, that’s different. You can:
- Upload the downloaded MP4 through a scheduler or Meta Business Suite
- Share the Reel link (if it’s someone else’s)
- Request a collaborator tag instead of reposting
- Download only if the creator allows it, then repost with permission and credit
When Reels won’t post, here’s what to do
Posting is the easy part. The real skill is knowing what to do when the Reels button disappears, an upload fails, audio gets blocked, or your Reel is not getting views. Use this quick diagnostic first, then jump to the exact FAQ.
| Symptom | Likely cause | Fastest fix |
| Reels button missing | App version, account status, rollout | Update app, log out/in, check Account Status, try another device |
| Reel upload failed | Storage, network, file type | Free storage, switch to Wi-Fi, export MP4 (H.264), retry |
| Stuck processing | Bitrate too high, unstable connection | Re-export at 1080×1920, medium bitrate, upload on Wi-Fi |
| Reel blurry | Low-res export, “highest quality” off | Export 1080×1920, toggle Highest Quality Uploads, avoid reposts |
| Reel muted | Licensing, business account limits | Swap to royalty-safe audio or original audio, re-add music in-app |
| Captions option missing | Feature rollout, permissions | Update app, allow speech recognition permissions, restart app |
| Cropped text | Wrong aspect ratio, no safe zone | Edit 9:16, keep text away from top/bottom UI areas |
| Reel not getting views | Weak hook, wrong audience, low retention | Fix first 2 seconds, simplify caption, post to feed, test timing |
Why can’t I post a Reel?
Run this checklist in order. It fixes most cases in under five minutes.
- Update Instagram (iPhone: App Store, Android: Google Play)
- Force close the app, reopen, then log out and log back in
- Check Settings → Account → Account Status for restrictions
- Confirm permissions: camera, microphone, and storage access
- Assume a rollout: some Reels features are region-based or gradual
- Try another device or account to isolate whether it’s account-specific
Why is my Reel blurry / muted / stuck processing?
Treat this as two separate problems: quality and licensing.
Quality issues come from export and upload. Re-export at 1080×1920, 9:16, H.264, and upload on Wi-Fi with Highest Quality Uploads enabled. If it’s muted, it’s often music licensing. “Music unavailable business account” usually means you need original audio or royalty-safe tracks.
FAQs
Use 3 to 8 hashtags that match the topic and audience. Too many looks spammy and can dilute relevance. Put your main keyword in the caption first, then add a few tight hashtags and a location.
The best hashtags are specific, not huge. Choose tags that describe the niche, the format, and the intent. Example: “home gym” beats “fitness.” Pair 1 broad tag, 3 niche tags, and 1 local tag.
On the final publish screen, tap Add location, search, and select the place. Locations help local discovery and clarify context. If it does not appear, update the app and make sure location permissions are enabled.
Before you share, tap Tag people. To add a collaborator, choose Invite collaborator, then select the account. When they accept, the Reel can appear on both profiles, combining likes and comments into one post.
On the publish screen, look for Tag products. You need Shopping set up and approved for the account. Choose the product from your catalog, place the tag, then publish. If the option is missing, check Commerce eligibility.
Open your Reel, find the comment, then press and hold it. Tap Pin. Use this to highlight a CTA, a FAQ answer, or a testimonial. If Pin is missing, update the app and try again.
Write one clear sentence that says what the viewer gets, using a keyword they would search. Add one proof point, then one CTA. Keep it readable. If you need help, use our Instagram caption generator and caption templates. Ad maker for Instagram will generate the best caption for you.
Tap the audio name on a Reel to open the audio page. Then tap Save audio. Saved audio lives in your audio library when you create a new Reel. If the Save option is missing, it may be restricted.
Upload a video that already contains your audio, then keep Original audio on. You can also record a voiceover inside the Reel editor. If you need clean sound, edit it first, then export as MP4.
In the Reel editor, open audio controls and adjust the music level down, then raise voiceover or original audio. If sliders do not show, re-add the track or restart the editor. Keep voice clear at normal phone volume.
Export 1080×1920 at 30 fps for the safest results. Higher frame rates can work, but consistency matters more than maximums. Keep bitrate medium to high, and avoid re-exporting multiple times to prevent softness.
Cropping happens when the video is not true 9:16 or when key content sits outside safe zones. Fix it by editing on a 9:16 canvas, keeping faces and text centered, and leaving space at the top and bottom.

Emma blends product marketing and content to turn complex tools into simple, sales-driven playbooks for AI ad creatives and Facebook/Instagram campaigns. You’ll get checklists, bite-size guides, and real results, pulled from thousands of Zeely entrepreneurs, so you can run AI-powered ads confidently, even as a beginner.
Written by: Emma, AI Growth Adviser, Zeely
Reviewed on: January 30, 2026