An easy guide on how to edit Instagram Stories in 2026
To edit an Instagram Story before posting, use the Story editor to crop/zoom, trim video, add text, stickers, music, and a background color, then preview and post.
After posting, you generally can’t change the actual media/text on that Story slide; the usual fix is to delete and repost, or add a quick “correction” slide.
For evergreen content, add the Story to Highlights and manage it there. If you want cleaner Stories in less time, build a reusable template (fonts, colors, spacing) and stick to safe zones.
Instagram Stories are quick, but “quick” doesn’t have to look sloppy. This guide shows exactly how to edit a Story on Instagram before it’s live, what you can still change after posting, and how to edit videos for Instagram Story without losing quality. I’ll keep it practical, 2026-current, and free of fluff.

How to edit an Instagram Story before posting
This is where you win. Stories are temporary, so your best results come from getting the edit right before you hit Share. Instagram’s own Help Center pages about Stories and related settings reinforce that Stories are built around quick creation and short viewing windows.
How to not make your edits get wrecked
You don’t need to memorize specs, but you do need to respect them.
- Best size: 1080 × 1920 (9:16)
- Keep key text away from edges: leave breathing room at the top and bottom
- Avoid “double compression”: don’t download, re-upload, and re-record the same clip
That last one is why your clean edit starts inside the Story editor, not after you’ve already posted. Read this article now to find out the right Instagram story size and dimensions.
Step-by-step flow: camera, gallery, or template
This is how I want you thinking about it. You’re not making a Story. You’re choosing your starting point. Camera, gallery, or template. Each one has a slightly different rhythm.
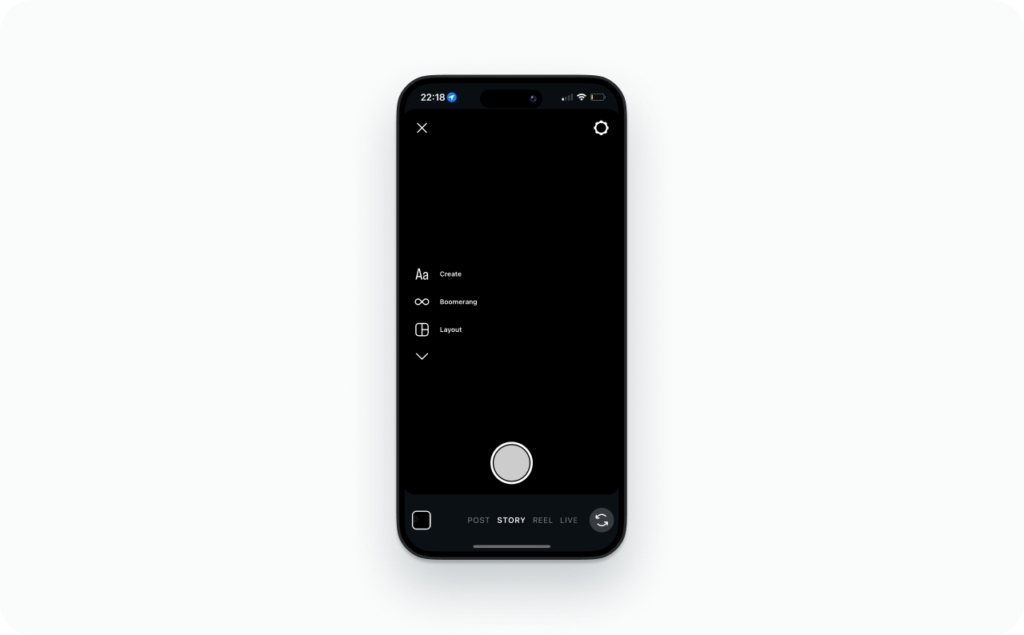
How to create a Story from the camera
This is the fastest way when the moment is happening right now.
- Open Instagram and tap your profile photo (or swipe right)
You’re inside the Story camera instantly - Record a clip or take a photo
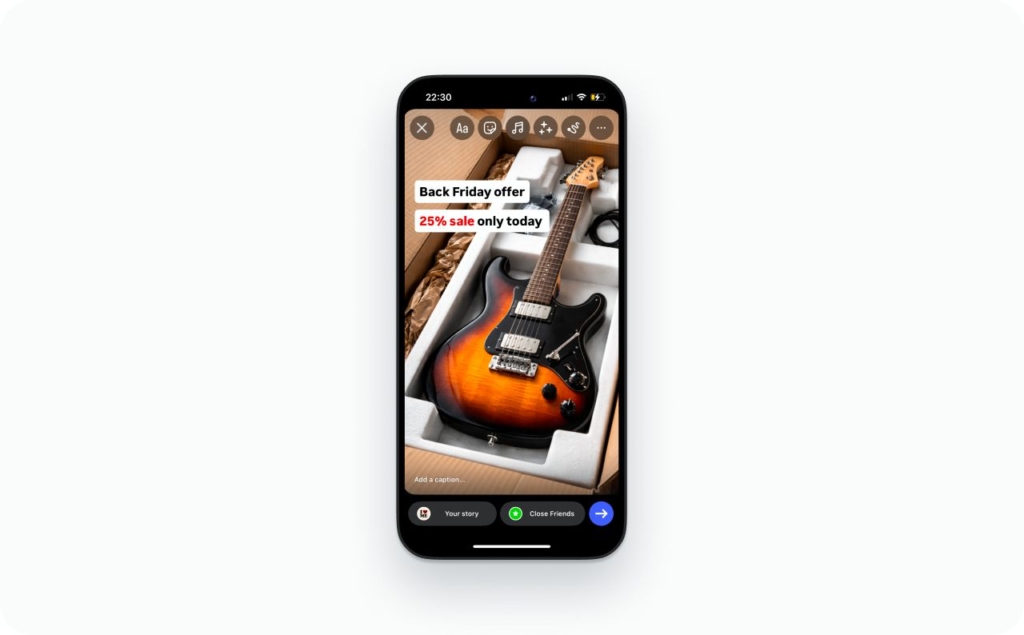
Hold to record video. Tap once for a photo - Tap the edit tools at the top (text, stickers, draw, effects)
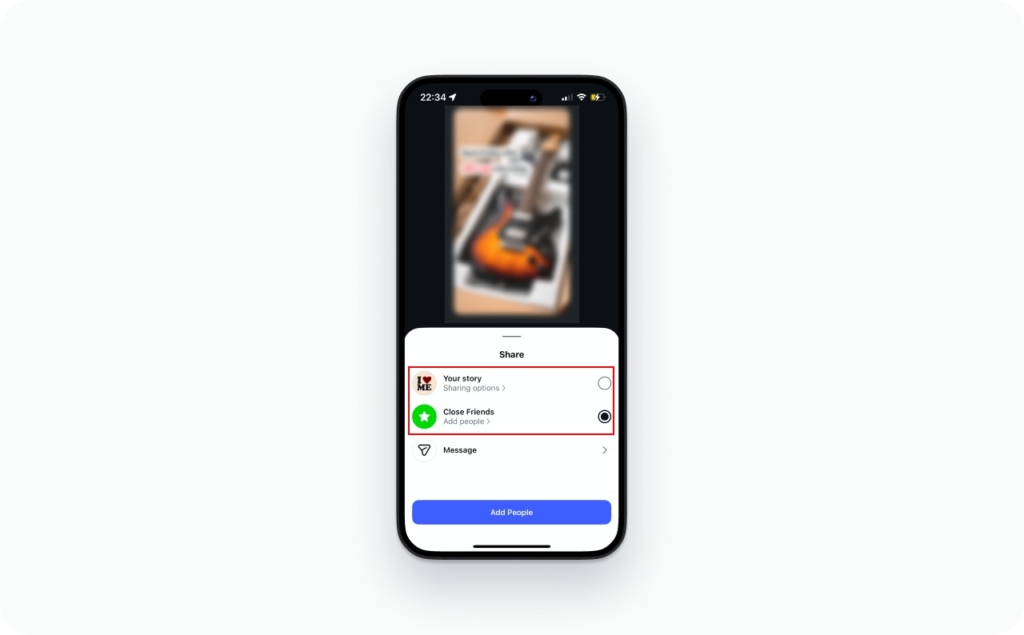
This is where you clean it up before anyone sees it - Tap Next (or Send to) and choose Your Story
Post it publicly, or switch to Close Friends if it’s more personal
On iOS and Android, button labels can vary. You might see Next, Done, or Send to depending on your version. Same function, different wording.
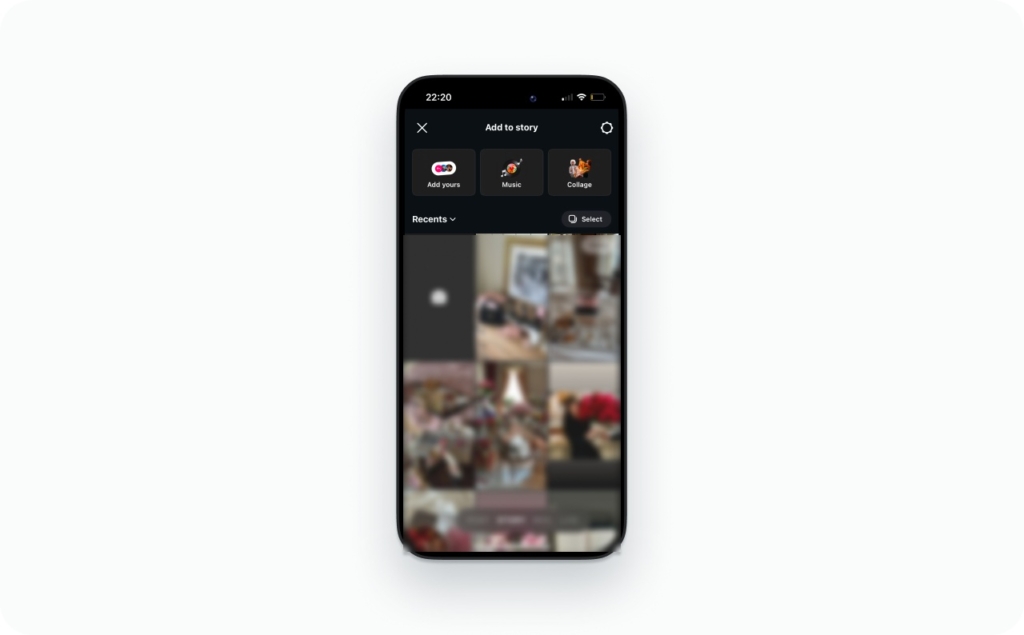
How to create a Story from your gallery
This is what I use most for promos and product content.
- Open the Story camera
Same starting point as recording - Tap the gallery thumbnail (usually bottom-left)
This pulls in your saved photos and videos - Select one item or multiple for a sequence
Multi-select lets you plan your slides instead of guessing the flow - Edit, preview, then post
Always preview full-screen. Tiny spacing issues only show up there
Gallery Stories usually look more intentional because you’re choosing content, not reacting to it.
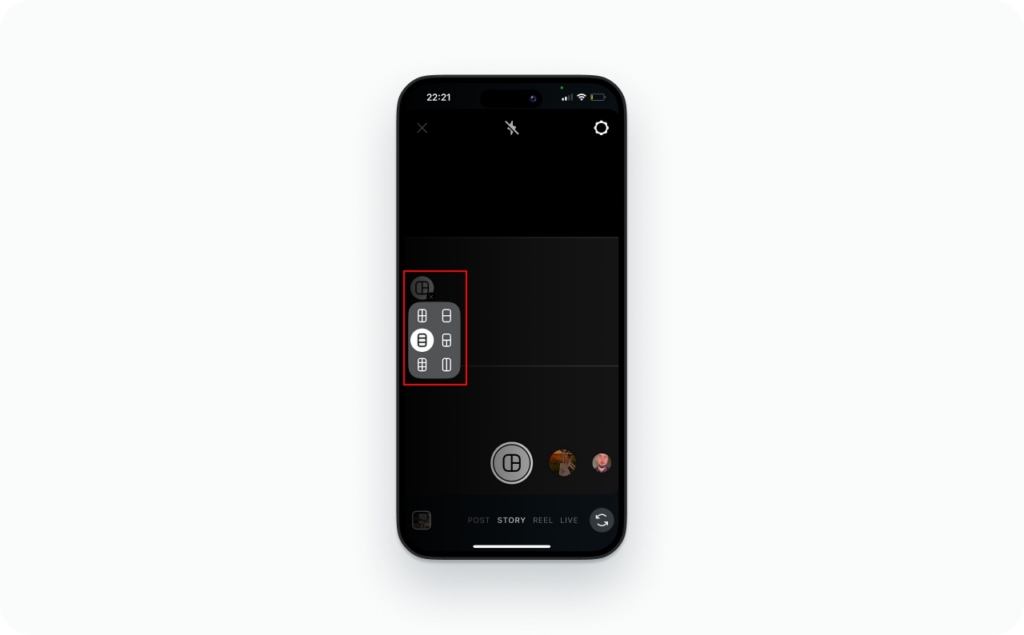
How to create a Story from a template
If you want consistency without thinking every time, use a template.
Your template can be:
- Instagram’s built-in layouts and text styles
- A saved base Story from your Archive
- A design you made once in Canva, Zeely, or another tool
Here’s the tap path:
- Open the Story camera
- Pull in your saved template image or video from the gallery\Add fresh text, a link sticker, and your CTA
- Post
Templates save time because you’re editing the message, not rebuilding the layout. That’s how you stay consistent without burning energy on design every day. You may also like to read the article about Instagram story templates.
Do this before you post
- Check spelling in the first line of text
- Check that your face/logo isn’t under stickers
- Check your link sticker actually looks tappable
- Check audio levels if you added music
- Check safe zones: top, bottom, and right edge
Common mistakes that make Stories look amateur
- Text touching the edge of the screen
- Five fonts in one Story
- Weak contrast (white text on bright video)
- Tiny link sticker hidden in a corner
- Over-filtering that turns skin or product colors weird
Now let’s get into the edits that matter most.
Edit photos in Stories: crop, rotate, zoom, filters
If you’re searching how to edit pictures for Instagram Story, this is the clean method.
- Pinch to zoom slowly. Fast zooming usually looks jumpy
- Use the grid (or your eye) to keep faces centered and logos straight
- Rotate only when you must. Crooked horizons are louder than you think
- If your subject warps, you zoomed too far. Pull back until it looks normal
For basic color tweaks, think in three simple levers: brightness, contrast, saturation. Brightness fixes dark clips, contrast adds separation, saturation can help food or product shots. Saturation can also make everything look fake fast, so keep it light.
Quick fix you’ll use a lot: if the photo is wrong, don’t fight it. Remove that slide and pick a different photo before posting. It’s faster than trying to rescue a bad image.
Edit text like a pro: fonts, color, size, alignment, layering
Here’s the clean way to edit text on Instagram Story.
- Tap Aa to add text
- Type your line
- Swipe through the font styles. Pick one that fits your brand
- Resize it with two fingers
- Drag it into place.
Now slow down for ten seconds and check readability.
If the text feels cramped, don’t shrink it more. Break it into two lines. Short lines read faster. Bigger text almost always performs better than tiny clever text.
To change text color on Instagram Story, tap the color dots or use the eyedropper to pull a shade from your image. This keeps your color palette consistent without guessing hex codes.
For alignment, use the center guide as your anchor. Clean vertical alignment instantly makes your Story look more intentional.
If the background is busy, add contrast:
- Use a subtle background strip behind the text
- Choose high contrast colors
- Slight outline if needed
Keep outlines soft. Heavy shadows make Stories look dated fast.
Layering trick I use all the time:
- Create one bold headline
- Add a second smaller text box for detail
- Keep spacing consistent between them
If you want that “text behind object” look, duplicate your text. Place one layer, then partially cover it with a sticker or cutout. It creates depth without fancy editing.
Simple rule: your text should be readable in one second without squinting. If it’s not, simplify it.
How to edit Instagram Story background
If you want your Stories to look on-brand fast, background is the cheat code.
Method 1: Solid color background
- Add a photo, then tap the draw tool
- Pick a color from your palette
- Press and hold to fill the background
- Add the photo back as a sticker if you want the cutout look
Method 2: Gradient vibe
- Start with a solid fill
- Add a second color using shapes or a subtle overlay
- Keep it simple: one base color, one accent
Method 3: Blur behind the subject
- Add your photo/video
- Add a blurred version behind it (or use an effect that softens the background)
- Keep the subject sharp, keep the text high-contrast
Cutout/collage aesthetic:
- Add your photo as a photo sticker
- Pinch to zoom and tilt slightly
- Layer with shapes or a light color block behind it
That’s how to edit Instagram Story background without spending an hour on it. Read now a detailed guide on how to change the background color on an Instagram story.
Stickers & interactive edits: polls, links, mentions, hashtags
Stickers are your “make it feel alive” tool.
Tap path:
- Tap the sticker icon
- Choose poll, quiz, slider, countdown, mention, hashtag, or link sticker
- Resize and rotate with two fingers
- Place it where thumbs naturally go (usually mid-to-lower screen, not the corners)
Link sticker basics
- Make it obvious: place it where it’s easy to tap
- Use a short CTA line above it: “Tap for sizes” or “Get the menu”
Hide hashtags without killing reach
- Shrink the hashtag sticker
- Tuck it behind a larger sticker
- Or match the text color to the background so it blends in
Keep the sticker count reasonable. One interactive sticker plus one link is usually enough.

How to edit Instagram Story after posting
Here’s the blunt truth: editing Insta Stories after posting usually means fixing the mistake with a workaround, not changing the original slide. And because sharing in DMs moves fast, your fix should be fast too. Lia Haberman notes a Meta rep told her DM activity was up 15% year over year in 2025, which means mistakes travel quickly.
Typo triage
- Tiny mistake (one word, still understandable): add a correction slide
- Wrong tag, wrong link, wrong price: delete and repost
- Evergreen info you’ll reuse: add to Highlights and clean it up there
Let’s break down what that looks like.
In most cases, you cannot open a posted Story slide and change the baked-in text, photo, or video. Once it’s posted, it’s posted.
What you can do:
- Delete the Story
- Repost a corrected version
- Add a new slide with the correction
- Adjust certain settings (privacy, replies)
- Save it to Archive and use it later as a “base” for a redo
Think of posted Stories as published screenshots. You can’t rewrite the screenshot, but you can replace it.
Fix a typo fast: delete & repost vs add a correction slide
Option A: Delete and repost
- Open your Story, go to the slide
- Tap More (three dots)
- Tap Save (to camera roll) if you need it
- Tap Delete
- Repost the corrected version
Best practice: saving first means you don’t rebuild your whole layout from scratch.
Option B: Add a correction slide
- Post a new Story slide immediately
- Write the correction in one line
- Keep the tone calm: “Quick fix: it’s 20% off, not 30%”
- If there’s a link, add the correct link sticker on the correction slide
This is the “version 2” move. It works best when the original Story is still useful.
What you CAN change after posting: privacy, replies, Close Friends
You can’t rewrite the media, but you can still control who sees future Stories and how people respond.
Common toggles people look for:
- Hide your Story from specific people
- Limit replies (everyone, followers, close friends, no one)
- Switch to Close Friends for your next Story run
High level note: mentions and reshares have their own rules based on settings, so if you’re doing something sensitive, check your Story privacy settings before you post the next one.
How to edit Story Highlights on Instagram
Editing Highlights is different. Highlights are built from your Archive, and they behave more like profile sections.
Typical Highlight edits:
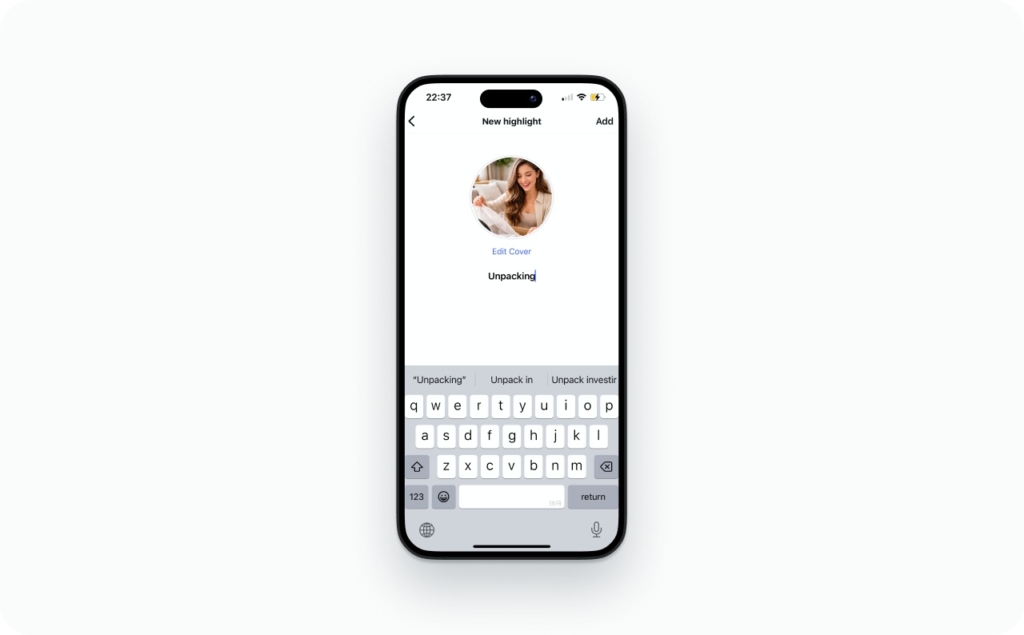
- Change the Highlight cover
- Rename the Highlight title
- Add or remove slides
- Reorder slides inside the Highlight
Treat Highlights like mini landing pages. One topic per Highlight. Clean cover. Clear name. No chaos.
If you want evergreen content to look polished, Highlights are where you do the cleanup.
How to edit video on Instagram Story
Video Stories only work when they’re tight. If your clip drags for even a second, people tap away. Hootsuite’s 2026 Social Trends report points to the rise of “micro-dramas,” with Deloitte projecting $7.8B in revenue for this short, episodic format. That’s basically Story pacing done right.
Start inside Instagram first. Native tools are usually enough.
Only edit outside the app if:
- Your clip needs serious trimming
- Auto-captions aren’t accurate
- You’re combining multiple clips and need clean audio flow
If it’s a simple talking clip or product demo, keep it in-app. Faster workflow, less compression.
Trim, split, and sequence video into clean Story slides
Here’s how to edit video on Instagram Story without overthinking it.
- Trim aggressively
- Cut the first second if it’s just you adjusting the camera.
- Remove the “um” at the beginning. Dead air kills retention.
- Split longer videos into separate slides.
Each slide should carry one clear idea. Not three.
Sequence it like this:
- Hook
- Proof or explanation
- Next step
That’s it. Simple beats work.
My pacing rule is easy to remember: if you can’t describe the slide in one sentence, it’s trying to do too much. Simplify it, or break it into another slide. Read an article about an Instagram video guide for Reels and Stories.
Music and original sound: pick the right snippet
Tap path:
- Add your video
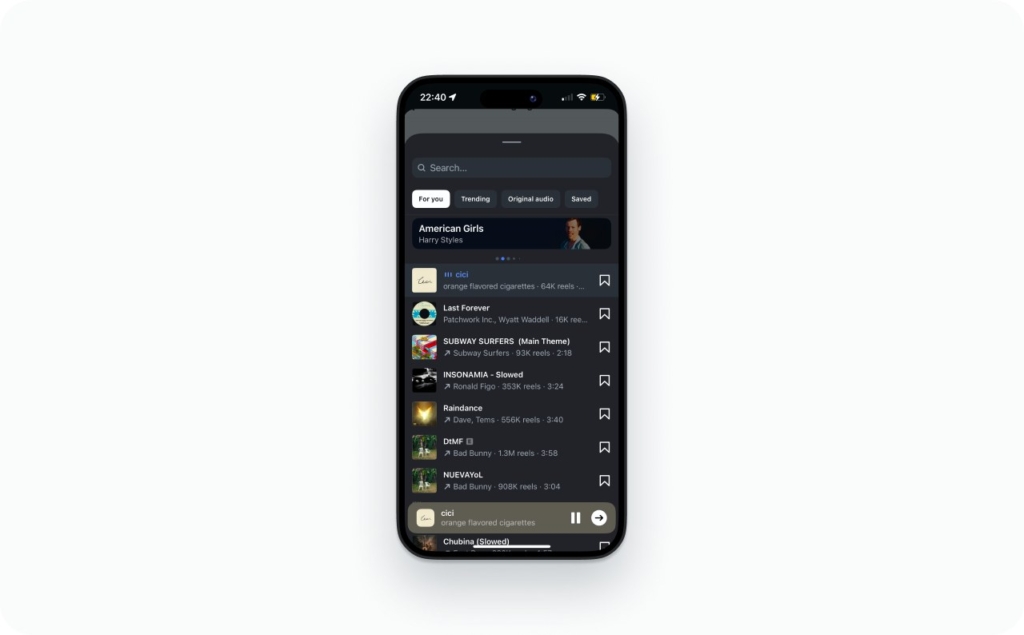
- Tap Music or the sticker
- Choose a track
- Pick the exact segment, the “good 5 seconds”
- Adjust volume
Audio mix tip:
- If you’re speaking, keep music low enough that your voice stays clear
- If your original sound matters (a reaction, a moment), don’t drown it
Quick reality check: if you’re asking how to change music on a Story after posting, you usually can’t. Delete and repost is the clean fix. Use this article to find out how to add music to Instagram stories.
Captions: add auto-captions and place them safely
Let me tell you what usually happens.
You film a great talking-head Story. You explain something clearly. You post it. Later you rewatch it in a quiet room and realize… the sound was never on.
A lot of people watch Stories without audio. On the train. At work. Late at night next to someone sleeping. If there are no captions, your message disappears.
Auto-captions are perfect when you’re:
- Talking to camera
- Teaching something step by step
- Explaining while showing a product
After you add them, don’t just leave them wherever Instagram drops them.
Move them into a safe zone. Not too close to the bottom where UI buttons sit. Not covering your mouth. Give them breathing room.
Then check contrast. If the video background is busy, add a subtle background strip behind the captions so they’re readable in one second.
And always scan for mistakes. Auto-captions love to mess up names, brand terms, and prices. Fix those manually before you post.
Captions aren’t decoration. They’re clarity. And clarity keeps people watching. Read my guide about captions for video content.
Quick quality fixes: shaky footage, blur, weird crops
- Stabilize if your phone/app offers it
- Avoid re-uploading downloaded clips
- Export at the right size once
- Don’t stack compression on top of compression
Preview before posting. Every time.
2026 power moves for Instagram Stories: templates, drafts, and AI Restyle
If you want your Instagram Stories to look better without spending more time, this is the section that matters. Most people think the secret is better design. It’s not. The secret is a simple workflow you repeat.
First, build reusable structure. Then use AI carefully where it actually helps.
Instagram officially announced Restyle AI for Stories on October 23, 2025, and it’s now part of the 2026 creator toolbelt. That means the editing tools are no longer “extra apps.” They’re inside your Story Instagram workflow.
Let’s break this into two parts: templates and AI Restyle.
Story templates that don’t look templated
An Instagram story template should remove decisions, not add decoration.
I recommend creating three base layouts for your Instagram stories and saving them as drafts or in your camera roll.
Here are the three that work for almost every small business.
1) Promo template
Simple layout:
- Headline zone at the top
- Visual or product zone in the center
- CTA zone near the bottom, above the safe area
That’s your layout. Don’t move it around every day.

2) FAQ or education template
- Question as the headline
- Two or three short answers
- A reply or poll sticker
This format works especially well for stories on Instagram when you want engagement without sounding pushy.
3) Behind-the-scenes template
- Short caption
- Location or mention sticker
- One human detail
That’s enough to make an Insta story feel real.
Now here’s what keeps an Instagram story template from looking generic. Keep the same margins every time. Keep the same font pair every time. Keep the same accent color for buttons and CTA elements.

Your brand kit can live in your Notes app. Two main colors. One accent color. Two fonts. One spacing rule.
When your layout and spacing repeat, your IG stories feel branded without extra effort.
That’s the workflow: reuse structure, swap content, publish faster.
AI Restyle in Stories: smart use vs overuse
Now let’s talk about AI Restyle.
Restyle is an in-app tool that lets you describe how you want your Story to look. You type a short prompt. Instagram adjusts the background, lighting, or overall style.
If you’re wondering how to edit Instagram story background quickly, this is where Restyle helps.
Use it for:
- Cleaning up a messy background
- Shifting lighting from dull to bright
- Creating a consistent theme across several slides
- Adding a subtle vibe change without redesigning everything
Don’t use it for:
- Inventing products that don’t exist
- Making “real life” look fake
- Over-editing your face into plastic
- Anything that could confuse customers
Trust beats polish. If you’re unsure what to write, keep prompts simple. Clear beats clever.
Try patterns like:
- Background: “Make the background a clean studio wall.”
- Lighting: “Bright natural window light, soft shadows.”
- Style: “Minimal, product-focused, high contrast.”
- Mood: “Warm and cozy, soft tones.”
- Placement: “Keep the subject centered, leave space at the top for text.”
That’s how to edit an Instagram story using Restyle without losing control of the message.
One more rule. Use one adjustment. Preview. Stop. Stacking presets and prompts usually makes your story Instagram visuals look artificial. One clean edit improves clarity. Five edits create noise.
Templates give you structure. AI Restyle gives you polish. Your workflow ties it together. That’s the 2026 power move.
FAQ
Not really. You can’t change the baked-in photo, video, or text. The fix is delete and repost, or add a correction slide right after.
If it’s small, add a quick correction slide. If it changes meaning (price, date, link), save the Story, delete it, then repost the corrected version.
You can’t edit the original text once it’s posted. Your choices are reposting a corrected slide or posting a new slide that clarifies the mistake.
Open your Story, go to the specific slide, tap the three dots, then delete that slide. The rest of the Story sequence stays up.
You usually can’t. If the music snippet is wrong, delete and repost the Story with the correct track and segment.
In the Story editor, tap the sticker icon, choose Link, paste your URL, customize the sticker text, then place it where it’s easy to tap.
Most of the time it’s placement or contrast. Move it away from the edge, make it bigger, and add a simple CTA line above it. Also confirm the URL opens correctly.
Blurry Stories often come from low-res source files or repeated re-uploads. Start with a 1080×1920 file, avoid downloading and reposting, and don’t stack edits across multiple apps.

Emma blends product marketing and content to turn complex tools into simple, sales-driven playbooks for AI ad creatives and Facebook/Instagram campaigns. You’ll get checklists, bite-size guides, and real results, pulled from thousands of Zeely entrepreneurs, so you can run AI-powered ads confidently, even as a beginner.
Written by: Emma, AI Growth Adviser, Zeely
Reviewed on: March 11, 2026