Setting up your first Zeely project in 2026
Wondering how to launch your first Zeely project without wasting your budget or guessing what to click? In this guide, I combine Zeely’s product workflows and real campaigns to show you how to set up your first project the right way.
What a “Zeely project” is and why you need it
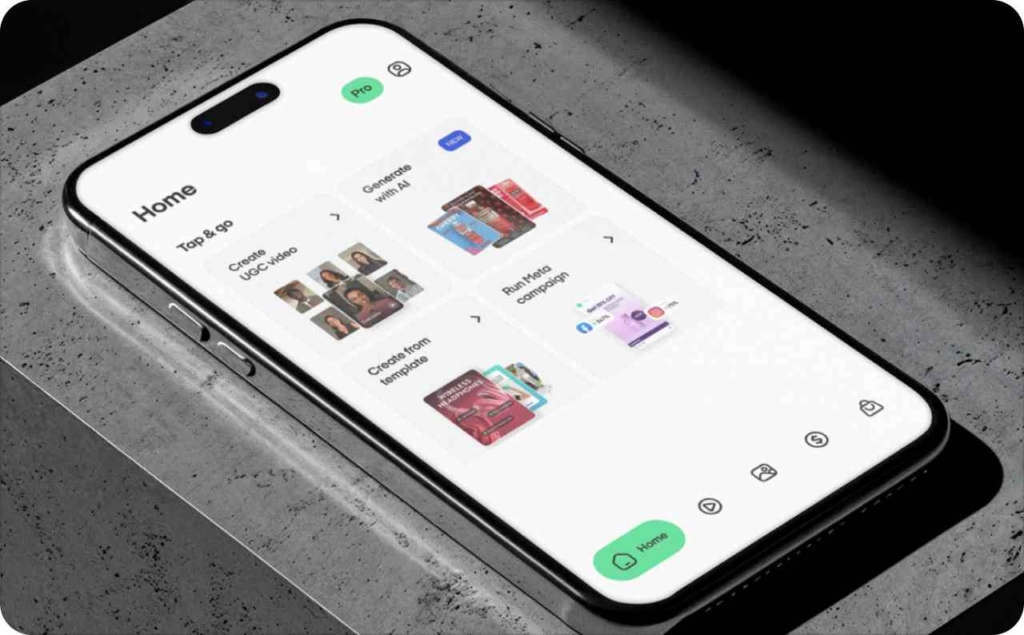
A Zeely project is the ad creative built inside the Zeely app. Zeely workspace allows you set up your basics, add what you sell, make your first AI video creatives, and launch your ads. Once these pieces line up, the app can automate your ad campaign.
Here’s what you can have:
- Your account setup
- Your product or service list
- Your AI creatives (static and video)
- Your active campaigns
- Your analytics and benchmarks
The steps are simple because they’re built for small business owners, local services, e-commerce brands, and Shopify stores who don’t want to wrestle with complicated tools.
This moment matters. Digital ads keep growing in 2026, and small businesses are adopting AI faster than enterprise teams. Salesforce’s SMB Trends report shows how quickly owners are turning to AI to simplify marketing tasks and protect their time. I see it inside Zeely every day: once the project is set up cleanly, the learning curve drops fast.
Before you move on, check that your base is solid:
- Your products are clear
- Your offer is simple
- Your project has one goal
- Your analytics panel is active
This is the foundation you’ll build on in 2026.
Step 1: Create your Zeely account on mobile or web
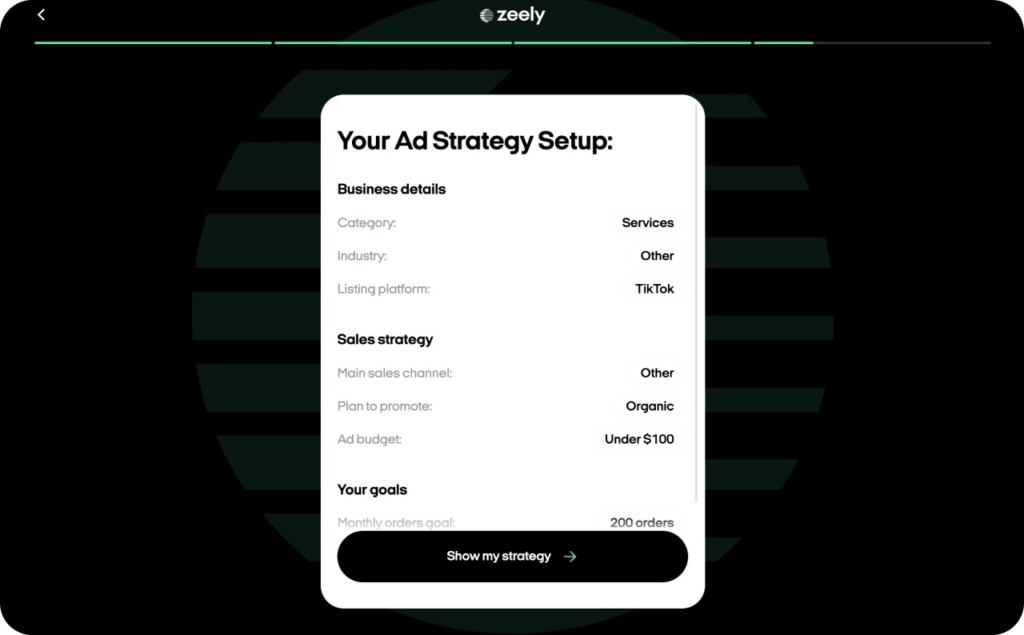
You can start your Zeely account in two ways: on your phone or on your computer. Both paths take only a few minutes, and both follow the same goal — help you set up a workspace built around your niche, your products, and your offers. Before I set up a new project with a client, this is the exact first step I take.
Mobile setup:
Download the Zeely app, complete the 3-minute onboarding quiz, set your password, and add basic business details. The quiz matters. It helps the app shape your niche, creative style, and starter offers so your first ads feel right for your business.
Web setup:
Go to app.zeely.ai, take the same quiz, and create your account.
Before you start, have a few things ready:
- Your website or social profiles
- Your product or service list
- Pricing, bundles, and special offers
A quick note on access: keep your login private, use strong passwords, and create a team login only if someone else will help you manage campaigns. This protects your budget and keeps your data safe.
Digital marketing keeps growing each year, and more small businesses rely on platforms like Zeely to speed up setup and reduce manual work. DemandSage reports that owners now depend on digital channels for most new customer acquisition. A clean account setup puts you in a strong position before your first campaign ever runs.
Step 2: Set up your first project — business basics and products
Once your account is ready, your next move is to turn it into a working Zeely project. This is where the app starts to understand who you are, what you sell, and how to shape your first creatives.
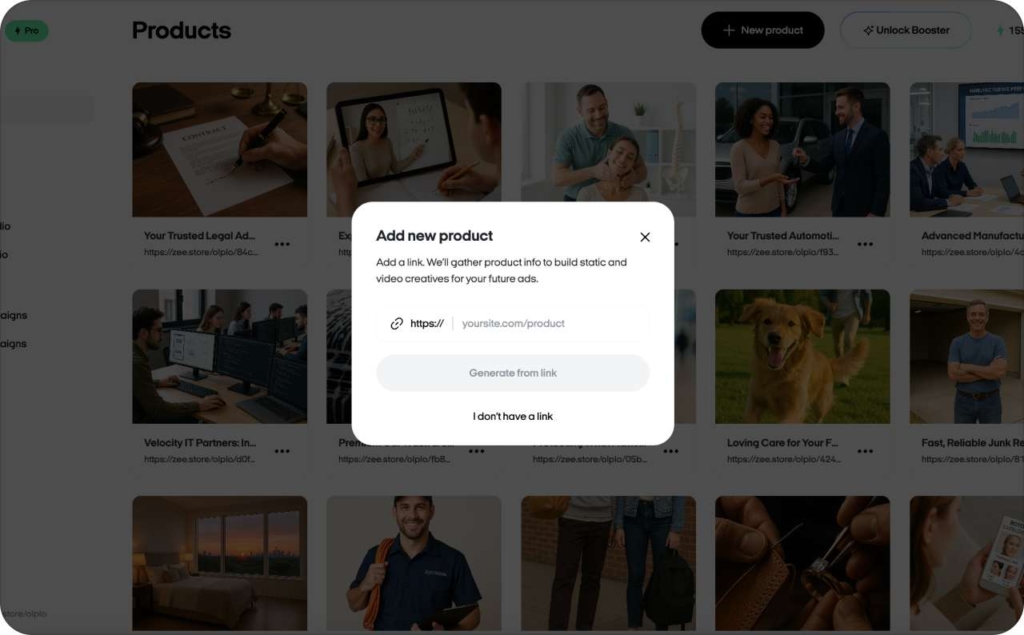
Next, add your products or services. If you already have a website, paste your URL and import items automatically. Zeely pulls titles, images, and descriptions, which you can adjust before saving.
If you don’t have a website yet, enter items manually. The flow is simple and works well for service businesses.
AI works best when it has enough context. Give it your USP, your pricing level, your categories, and a clear sense of what you’re promoting first. Strong context leads to stronger creatives, and the difference shows up fast in click-through rates.
If you’re not sure what to add, start with a focused catalog:
- 1 item or service per project
- Clean, bright photos
- A simple offer: discount, bundle, or small bonus
When these three parts line up, the AI can shape creatives that feel right for your market and your price point. Your first project doesn’t need to be big. It needs to be clear.
No website? Build a Zeely-driven funnel anyway
You can still launch a strong project without a website. Many local and offline businesses run this way. Use Zeely as your landing replacement and connect traffic through socials or messaging apps.
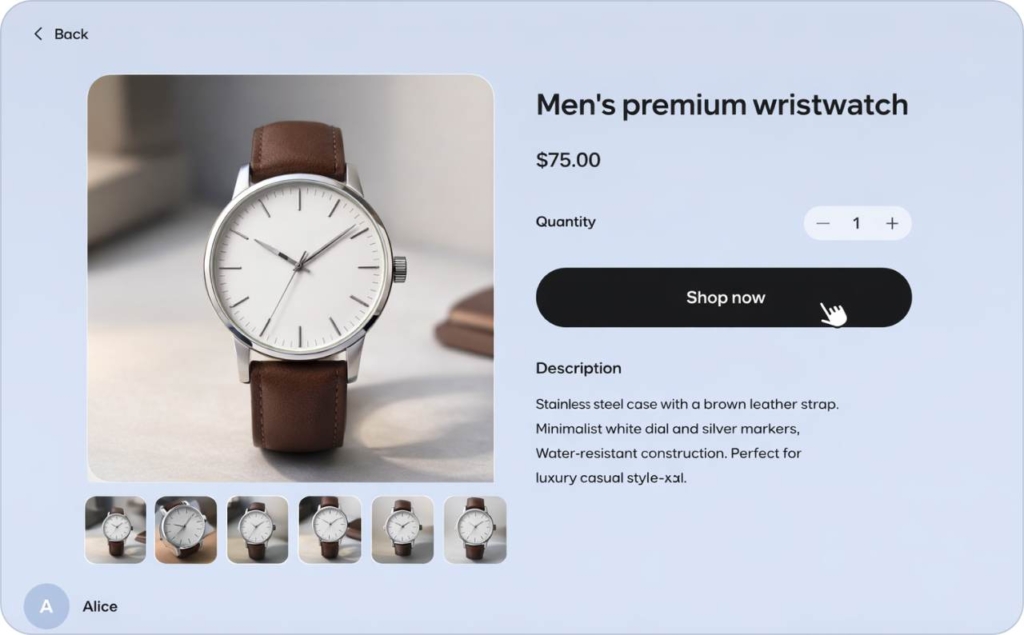
Zeely formats each product or service card like this:
- Hero product gallery
- Purchase panel
- Product details
- Seller identity
This layout helps people understand what you do and take action even without a formal site.
Shopify and existing sites: connecting Zeely the smart way
If you already have a website or a Shopify store, you can import products by dropping your link into the product import tool. With a Shopify integration, Zeely will pull your items, photos, and descriptions.
After importing, check titles and images manually. This helps the AI generate ads that match your store’s real look and tone. A few quick edits here save time later when you start testing creatives.
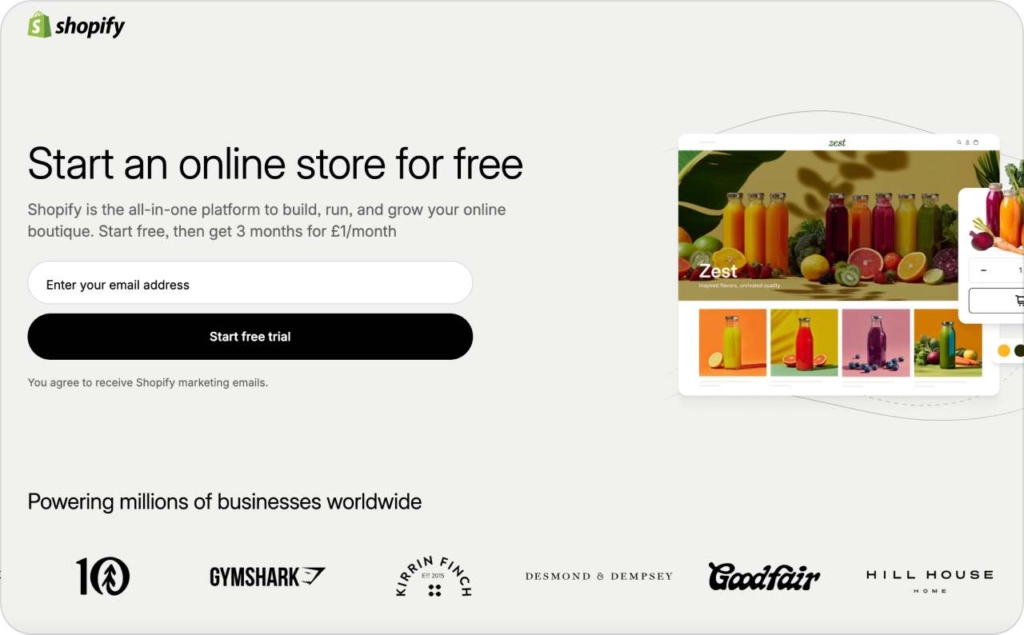
Photo source: Shopify
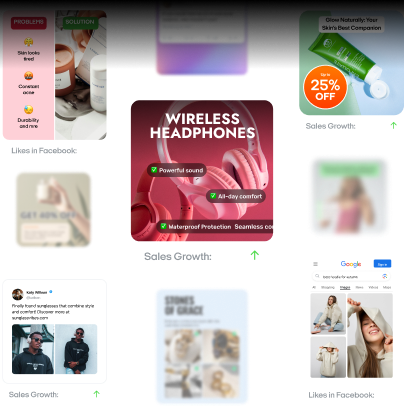
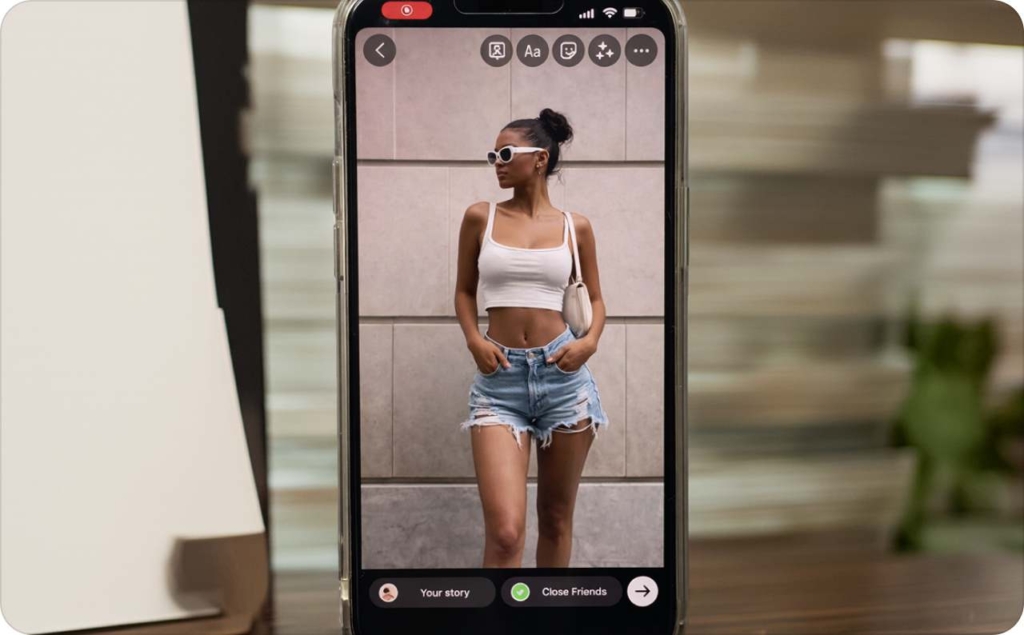
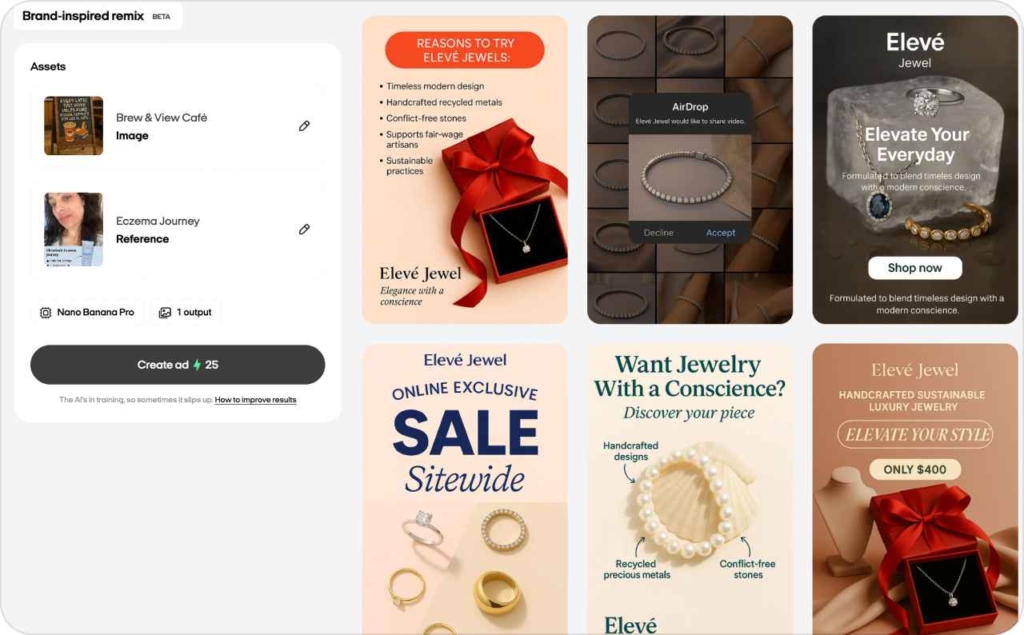
Step 3: Let Zeely AI generate your first creatives
Your project starts to move once your creatives are in place. Inside Zeely, you can make static ads, short AI videos and avatar-style videos without leaving the app. I treat this step like a warm-up: simple inputs, clear direction, fast results.
- Static creatives work well when you need quick A/B tests.
- AI videos help you show motion or a strong benefit fast
- Avatar-style videos add a face and a voice when you don’t want to film anything yourself
All of this works best when your prompt gives the AI a sharp direction. Here’s the table I give new users:
| Good prompts | Weak prompts |
| “Show my lavender scrub on a clean background. Add a short line about smoother skin.” | “Make a nice picture.” |
| “Focus on the 20% weekend offer. Calm tone.” | “Make a video for my product.” |
| “Bright, warm colors. Clear CTA: Book today.” | “Make it catchy.” |
When your creatives vary in style and angle, your metrics move faster. Different people respond to different visuals, and you want the algorithm to find those matches early. A small mix of formats usually lifts CTR and lowers cost per lead because you’re not betting on a single idea.
This shift isn’t unique to you. TechRadar reports that 93% of CMOs already see ROI from GenAI. I see the same pattern inside Zeely: clear inputs + creative variety = faster first wins.
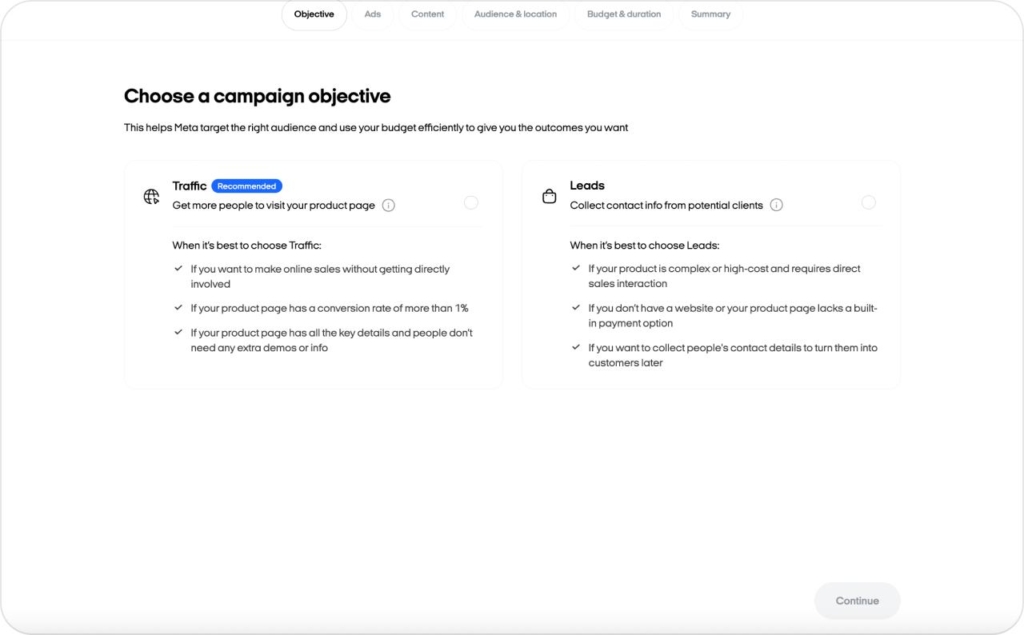
Step 4: Launch your first paid campaign
Your project is ready, so now you can run your first paid campaign. I look at this step as a straight-line process: set your goal, pick your audience, choose a small budget, and let the system learn. You don’t need perfect settings. You need a clean start.
First, choose your objective.
- If you want people to call or message you, use Leads
- If you want early traffic for testing, use Traffic
Next, set your geo and audience.
Local businesses do best with radius targeting because it keeps your spend close to customers who can actually show up. Online stores often start broad and let the algorithm narrow down.
If you have pixel data or past leads, you can retarget them later, but it’s not required today.
Now pick your daily budget and duration.
Give the campaign enough room to learn. I usually recommend a small daily amount you’re comfortable repeating for a few days. A short test won’t tell you anything useful.
Before you launch, check your preview.
- One offer
- One clear message
- Creatives that match what you actually sell
- Then press launch
A quick note I repeat often: don’t grade your campaign after 24–48 hours. Early results jump around. The system is still figuring out who clicks, who converts, and who ignores the ad. When you give it a full learning window, your numbers settle into a pattern you can trust.
Start small. Stay patient. Let the system work for you.
Recommended testing budgets and timelines for Zeely beginners
Here’s the simple guide I use with new users:
| Business type | Daily budget | Test window |
| Lead generation | $10 | 5–7 days |
| Local services | $10–$15 | 5–7 days |
| E-commerce | $10–$20 | 7–10 days |
The first days are the learning phase. The app is testing placements, audiences, and angles. You want enough impressions and clicks to make the results meaningful. A slightly longer window gives you cleaner data and decisions you can trust.
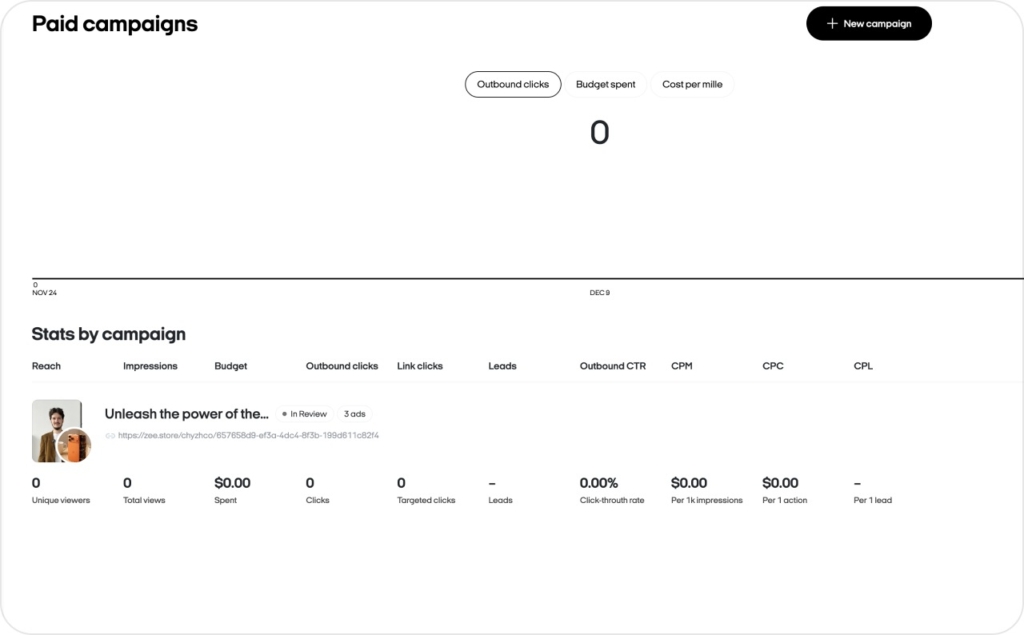
Step 5: Track, understand, and improve results in Zeely
Inside the Zeely dashboard, you can see impressions, clicks, cost per lead, leads, calls, and messages. I check these panels the same way every time because it keeps things simple and predictable. You’ll find the same layout in the Help Center if you want a quick visual.
There are a few core metrics I explain to every new user:
- CPM: cost per 1,000 impressions. A basic indicator of how expensive your audience is
- CTR: click-through rate. A signal of how attractive your creative and message are
- CPC: cost per click. How much it costs to bring someone in
- CPL: cost per lead. The number most service businesses watch first
- ROAS: return on ad spend. E-commerce teams use this to read true profitability
Here are the thresholds I use as quick checks:
- CTR below 0.8% → refresh your creative
- CPL above your target range → adjust your offer or audience
I use a simple loop when I help users improve results: analyze → create a small hypothesis → adjust creative or audience → retest
What “good” results look like for your first 30 days
Your first month sets your baseline. Local services often see CPL in the $3–$8 range once the campaign settles. Lead-gen offers usually land a bit lower. E-commerce results vary more: early ROAS often falls between 1.2–2.0 before optimization. These are healthy starting points, not final goals.
Here’s how to read your numbers:
- Lead-gen: rising CTR and steady CPL = keep going
- E-commerce: clicks + add-to-cart movement = optimize, don’t pause
- Flat results: pause only when costs keep rising after adjustments
Avoid common mistakes new Zeely users make
Most early problems I see come from a few repeat patterns. They show up in Reddit threads, Trustpilot reviews, and support tickets, and they’re all avoidable once you know what to look for.
The first one is a weak offer. If your ad sends people to a page (or product card) that doesn’t explain what you do or why it matters, your clicks won’t turn into leads or sales. A simple offer works best: clear benefit, clear price, clear next step. Read about successful lead generation examples.
The second mistake is expecting instant sales. Real ads need a short testing window before they stabilize. If you pause too fast, the system never reaches the point where your costs settle. The pattern is the same across niches.
The third mistake is ignoring analytics. When you don’t check your CTR or CPL, you’re flying blind. Small adjustments early on save you the cost of a full restart later.
You’ll see a lot of noise online about scams or fake ads. Much of it comes from frustration with unclear offers or rushed campaigns, not the platform itself. And yes, fraudulent ads across social networks are a known industry problem; Reuters covered how platforms profit from them. Your protection is simple: clear settings, a clean offer, and proper subscription management.
A common mistake is repeatedly using the same templates and visuals across campaigns, because this can quickly lead to ad fatigue — your audience gets used to the creative, engagement drops, and results become less efficient. Zeely AI offers a wide range of ad templates and makes it easy to test different creative variants to see what performs best.
When you avoid these early traps, your first project becomes a learning loop instead of a guessing game.
Real first-project scenarios by niche (service, local, e-commerce)
Here are simple, real-world patterns I see across new Zeely users. No personal data — just the setups that repeat again and again.
Local service (beauty salon)
- Setup: three core services, one hero offer, short radius targeting.
- Creatives: 10 static images, two Avatar videos showing the result.
- Budget: $8–$12/day for 5–7 days.
- Typical results: stable CPL in the $3–$7 range.
I often hear the same line in reviews: “People finally understood what I offer.”
Niche e-commerce
- Setup: import 5–10 products, update photos, choose one main item for the first campaign.
- Creatives: product close-ups, quick benefit lines, and a short lifestyle video.
- Budget: $10–$20/day for 7–10 days.
- Typical results: ROAS starts around 1.2–1.8 while the system learns.
Reviewers usually mention “first clean clicks in days, not weeks.”
Shopify store
- Setup: import via Shopify link, group products by type, add pricing and bundles.
- Creatives: three visuals per product group.
- Budget: $15–$25/day.
- Typical results: improving CTR and early add-to-cart signals by day three.
- Setup: one service, one lead magnet, clear CTA.
- Creatives: talking-style video, simple static with the main promise.
- Budget: $5–$10/day.
- Typical results: predictable leads once the creative tone matches the audience.
These are the patterns I expect to see when a project is set up cleanly.
What’s next after your first Zeely project: scaling and experiments
Once your first project starts producing steady results, you can move into scaling. I treat this stage as a set of controlled experiments. You’re not rebuilding anything. You’re duplicating what works and adding one new idea at a time.
Start by duplicating your best campaign. Change the creative or the audience, but not both at once. This gives you clean A/B tests you can trust. When one version wins, keep it running and archive the weaker one. Small, steady wins build faster than big swings.
Next, expand your setup from one project to a small portfolio. Many owners create a project for each product group or service line. This helps the AI shape creatives and offers that match each niche instead of forcing one message to fit everyone.
As you grow, try a few advanced tools inside Zeely. Viral-style templates, new video formats, Shopify connections, hooks, and meme-based layouts help you reach people in ways static ads can’t. You’ll see these options in the Help Center. They’re quick tests with clear upside.
The timing is right. Digital ads continue to grow across every platform, and AI-driven media planning is becoming the default. When your basics are solid, these features help you scale without the stress of building everything manually.
If you’re ready for your next step, let Zeely AI handle the heavy lifting while you focus on the ideas.
Try Zeely AI and start your next campaign with confidence.

Emma blends product marketing and content to turn complex tools into simple, sales-driven playbooks for AI ad creatives and Facebook/Instagram campaigns. You’ll get checklists, bite-size guides, and real results, pulled from thousands of Zeely entrepreneurs, so you can run AI-powered ads confidently, even as a beginner.
Written by: Emma, AI Growth Adviser, Zeely
Reviewed on: January 5, 2026