How to change background color on an Instagram Story
Need to change the background color on your Instagram Story fast, solid color, gradient, or behind a repost? I distilled the 2026 Story editor into the exact taps, fallbacks, and fixes creators use on iPhone and Android.
To change the background color on an Instagram Story, open the Story editor, tap Draw, pick a color, then press and hold on the canvas to fill the screen. For a photo that doesn’t fill the frame, add the photo, scale it down, fill the background, then use the eraser/reveal trick or Photo sticker to keep the image clean. For a reposted feed post/Reel, add it to Story, then repeat Draw → color → press-hold.
Instagram Stories background color changes depend on what you’re posting: blank canvas, photo, video, or a reshared post/Reel. The same Draw + press-and-hold mechanic powers most full-screen fills, but reposts and videos add extra rules. When something doesn’t work, it’s usually brush choice, layer order, or a feature rollout.

Instagram Story background color in 2026: what’s changing and why it matters
An Instagram Story background is the layer behind everything else: your media, stickers, and text. In 2026, the editor keeps moving buttons around, and Instagram tests features unevenly by account and device. That’s why “my friend has it” is a real technical diagnosis, not a conspiracy. But read first how to post a story on Instagram.
Here are the three background types people confuse:
- Full-screen background fill: you choose a color and flood the canvas with Draw → press-and-hold
- Auto background: Instagram generates a gradient when you share a post/Reel to Story, and sometimes locks it
- Text highlight background: a readability layer behind text only, not the full canvas
Here is a mini glossary for you, so the rest is painless:
- Story editor: the screen where you assemble a Story before posting
- Create mode (Aa): a text-first Story mode with preset backgrounds
- Draw tool: the squiggle icon with pens/highlighters
- Highlighter: a translucent brush that tints instead of fully covering
- Color picker / eyedropper: samples a color from your photo
- Stickers: link, poll, music, GIFs, Photo sticker, and more
- Layers: the stacking order of background, media, stickers, and text
One reason to use a scenario-first guide: only 54% of brands say they feel confident keeping up with new social platforms and features, according to HubSpot’s 2025 roundup.
Method picker: 5 fastest ways to change Instagram Story background color
If you only read one section, read this. Pick your scenario and do the matching method.
| What you’re posting | Fastest method | Time to do it |
| No photo/video | Create mode (Aa) background OR Draw fill | 5–10 seconds |
| Photo doesn’t fit the frame | Photo shrink → Draw fill behind (or Photo sticker layering) | 10–20 seconds |
| Repost/share a feed post or Reel | Add to Story → Draw fill behind (or manual repost workaround) | 10–25 seconds |
| Video | Highlighter tint overlay OR blur background + overlay | 15–30 seconds |
| Text readability only | Text highlight background (not full-screen fill) | 5–10 seconds |
If you don’t see “Draw,” add any photo first. On some layouts, the Draw icon appears only after media is on the canvas. You may also be interested in reading about Instagram story size and dimensions.
Solid color background without a photo
Here are some methods I use often.
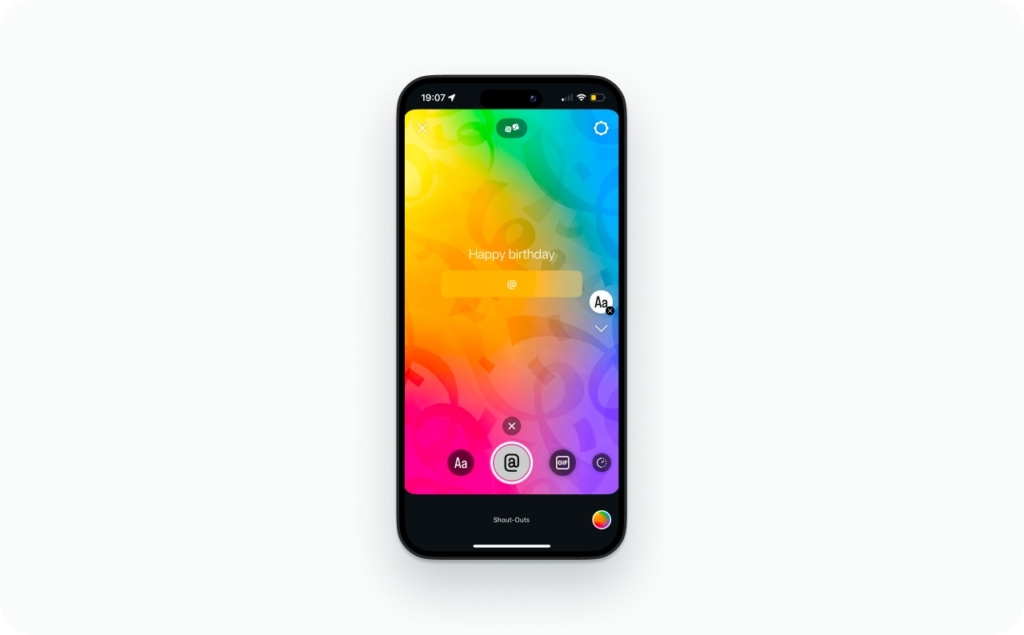
Solid-color background in “Aa Create” mode
Use this when you want a clean, text-first Story: announcements, quotes, simple CTAs, a Link sticker, polls, or “new drop” alerts.
Steps:
- Open Instagram → swipe right to Stories
- Tap Create (Aa)
- Tap the color circle to cycle backgrounds (solid or gradient options vary)
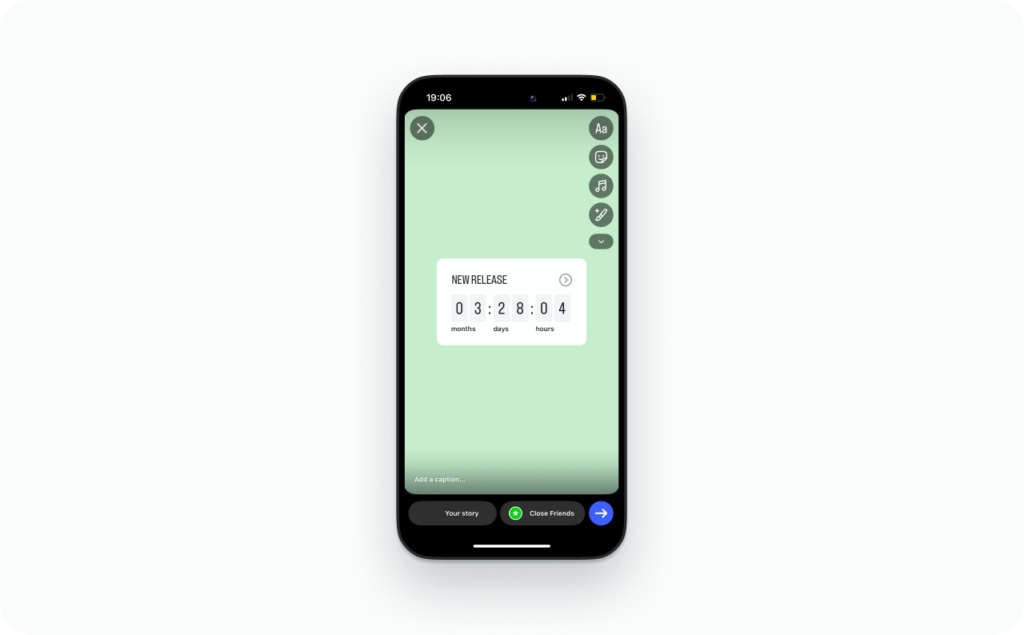
- Add text and stickers (link, poll, GIF, countdown)
- Post or save as a template
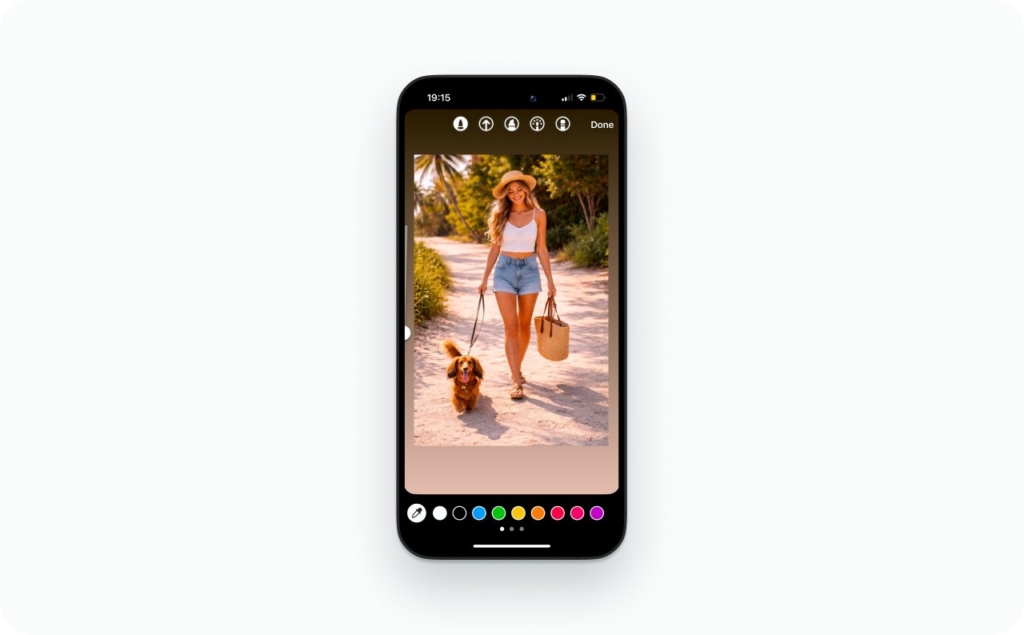
Draw tool full-screen fill
This is the most universal method. It works even when Instagram hides nice presets.
Steps:
- Start a Story (blank, Create mode, or with a photo already placed)
- Tap Draw (squiggle icon)
- Pick Pen for solid fill or Highlighter for translucent tint
- Choose a color
- Press and hold anywhere on the canvas to flood-fill
Micro-tips that prevent rage:
- Long-press a color in the palette to open the shade slider
- If the fill paints over your content, tap Undo and switch brush types
- If you need to reveal content, use the Eraser (more on that below)
Buffer reports people average about 33 minutes per day on Instagram, and notes Reels drive a big share of time, so fast, readable Stories still matter for keeping attention between scroll sessions.
Add background color behind a photo
This is the classic tiny photo floating on black problem. Fix it once and you’ll reuse it forever.
A workflow for photo shrink and color fill behind
Steps:
- Add your photo to the Story canvas
- Pinch to shrink the photo (so you see empty space around it)
- Tap Draw → pick a color
- Press and hold to fill the background
- Reposition the photo and add text/stickers
Why it can fail:
- If the fill covers your photo, you filled after the photo but used a brush that paints on top. Tap Undo, pick Highlighter (more translucent), and try again
- If it still covers, use the Photo sticker method below to force clean layering
Eraser reveal trick
This trick is simple: the paint layer sits on top, and the eraser reveals what’s underneath.
You can use it for frames, ripped-paper looks, “spotlight” edges, or when you want a messy brush vibe but clean photo edges.
Steps:
- Add photo
- Draw and fill background (even if it covers the photo)
- Switch to Eraser
- Erase over the photo area to reveal the original image beneath
- Add text and stickers last
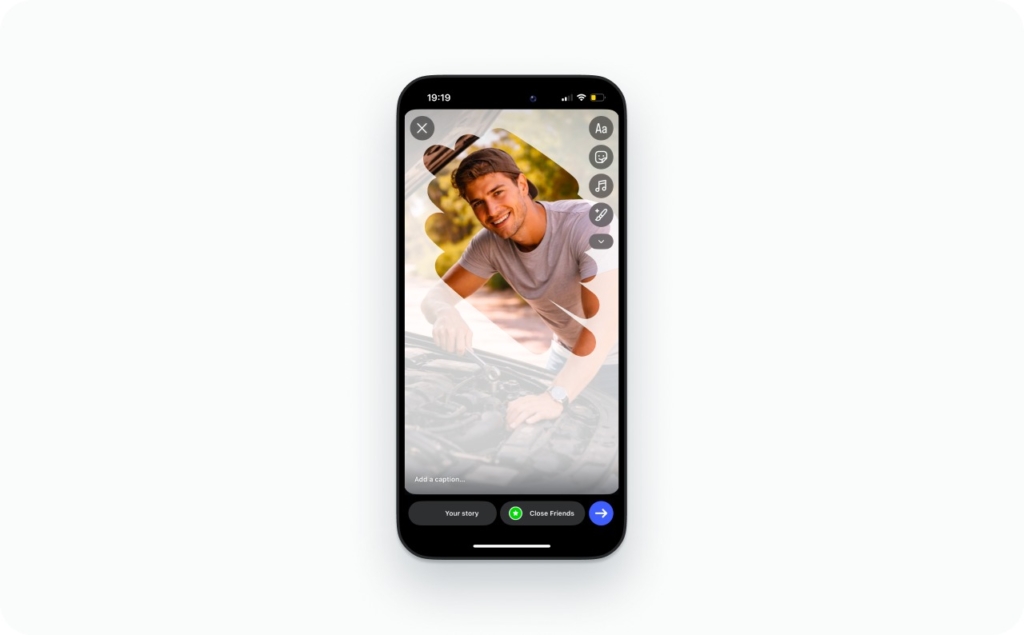
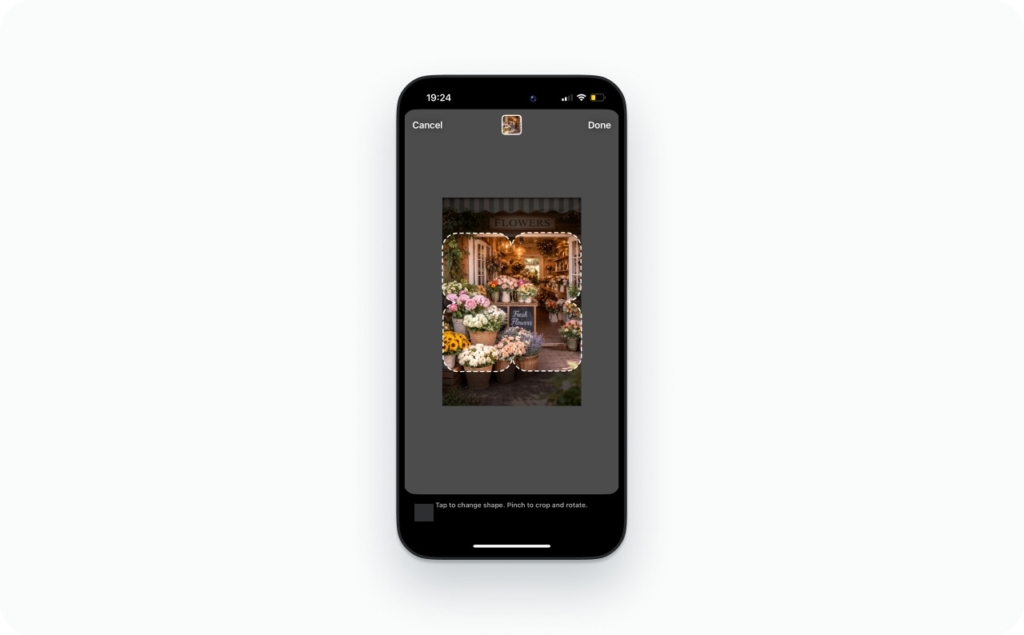
Photo sticker and copy-paste layering
When you want crisp edges and zero paint overlap, use a separate photo layer.
Photo sticker method:
- Fill the background first (Create mode or Draw fill)
- Open the sticker tray
- Tap Photo (Photo sticker) and select the image
- Resize and place it on top
Copy/paste nuance:
- On iPhone, copy/paste from Photos often works smoothly into Stories
- On Android, behavior varies by keyboard and OS version, so Photo sticker is the more consistent path when you have it
Why I like systematizing small visual choices: AppsFlyer’s 2025 creative optimization report analyzed 1.1M video creative variations and $2.4B in ad spend. Tiny creative decisions compound when you repeat them weekly.
Reposts and reshared posts: how to change the background color when sharing to Story
Reposts are where most “it doesn’t work” complaints live. The reason is simple: Instagram sometimes treats the shared post as a special object with a locked auto background. Read the complete guide on how to repost a story on Instagram.
Feed post → “Add to Story” background color change
Steps:
- On a feed post, tap Share (paper airplane)
- Tap Add to Story
- Tap Draw
- Pick a color
- Press and hold on the canvas to fill the background
It works best with static posts with simple compositions and strong contrast.
Reel share backgrounds
Reels shares can behave differently because the preview is animated, and Instagram adds UI overlays. You may also like to read the complete guide about AI reel maker.
Try this order:
- Share Reel → Add to Story
- Immediately tap Draw → choose color → press-hold fill
- If the fill covers the Reel sticker, tap Undo, switch to Highlighter, and fill again
- Add text and stickers last
How to repost manually:
- Screenshot the post (or screen-record the Reel clip you need)
- Upload it as a normal photo/video Story
- Then do your background fill normally
Why you can’t change the Ig background sometimes
Common reasons:
- The background layer is locked for that share type
- The feature is not rolled out to your account yet
- Your app version is behind
- The editor is stuck (cache state)
Safe fixes:
- Update Instagram
- Force close the app and reopen
- Try the method picker path: Create mode background + manual repost
- If Draw is missing, add any photo first, then check again
If you’re wondering why brands obsess over share-to-Story presentation: Business Insider reported an Aerie Instagram post hit 40,000+ likes, 500+ comments, and lifted engagement about 75% over a two-week span, based on Metricool’s tracking. Stories are part of that “presentation layer,” including background choices.
Video Stories: tint overlays, blur backgrounds, and Meta AI “Restyle” options
Video ads one extra rule: you often want the background to feel intentional without hiding the video. I like creating video ads with Zeely AI video ad generator because it makes the process fast, easy, and effective.
Highlighter tint overlay
Highlighter is your friend because it’s translucent.
Do this:
- Add your video to Story
- Tap Draw → choose Highlighter
- Pick a color
- Press and hold to tint the whole canvas
- If it’s too strong, undo and pick a lighter shade using the slider
Use a light shade with the Highlighter for a soft pastel tint, or use a deep color with the Highlighter and add bright text for a cinematic dark overlay.
When you want a full-frame look
This is for product demos, talking-head clips, or any video that looks “small” in the frame.
- Create a blurred backdrop (using a blurred frame or a blurred background media)
- Add a translucent color overlay (highlighter fill)
- Place your main video on top (centered, clean margins)
- Add one headline and one CTA
Keep it simple. Two layers usually beat five.
Meta AI Restyle / background-changing features
Instagram keeps adding new editing controls, including Meta AI options that can restyle media inside Stories. Availability varies by region and account.
Meta’s newsroom notes the ability to restyle photos and videos in Instagram Stories using Meta AI, plus additional editing features and sound effects in the Edits app.
When to use AI restyling:
- Quick theme shifts (snowy, underwater, warm film look)
- Removing distractions before you add text
- Matching a mood for a campaign week
When not to use it:
- When your audience expects true-to-life product color accuracy
- When you need consistent brand color control (use swatches and eyedropper instead)
Exact color control: custom shades, brand colors, black and white, and “hex” workarounds
If you want your Stories to look like “your brand,” you need repeatable color control even in collages, not random palette tapping.
Hidden shade slider and custom palette moves
Steps:
- Open Draw or text color palette
- Long-press any color dot
- Slide to choose a precise shade
- Use recent colors as your quick-access palette for the next Stories
Black/white micro-steps:
- Pick the black or white dot if visible
- If not visible, long-press a nearby color and drag to the corner extremes to hit near-black or pure white
Match colors from your photo
I like using Zeely AI Instagram ad creator because it offers many templates in different colors to match my photos. But here is the other way to match a background to a product label, logo, or outfit.
Steps:
- Add the photo that contains the color you want
- Open the color picker (eyedropper) in the palette
- Tap the exact pixel you want to sample
- Apply the fill (press-hold) with that sampled color
Brand workflow:
- Upload a logo image to the canvas
- Sample the logo color with the eyedropper
- Fill your background and save it as a repeatable template
Hex code
Instagram Stories typically does not let you type a hex code directly.
Workaround that works:
- Create a solid-color image swatch using your hex code (any design tool)
- Save it to your camera roll
- Upload the swatch to Stories
- Use the eyedropper to sample the exact color
- Press-hold to fill with that sampled color
Text background vs full-screen background
This is where most guides confuse people. Let’s separate it cleanly.
Text highlight background and opacity control
Text highlight background changes only the text box background. It does not flood-fill the whole Story.
Steps:
- Add text
- Tap the highlight/background style toggle
- Choose solid or translucent highlight
- Adjust color and placement so it frames the text
Use cases:
- Links and disclaimers that must be readable
- Captions on top of video
- Price and promo text
Contrast rules for legibility
Here are rules you can actually follow:
- For small text, use high contrast. Light text on dark background or the reverse
- Avoid mid-gray on mid-gray. It looks “aesthetic” and reads like a whisper
- If text sits on an image or gradient, add a solid or semi-opaque background behind the text
MDN’s WCAG explainer gives the hard rule: 4.5:1 contrast for normal text and 3:1 for large text.
Troubleshooting
| Symptom | Likely cause | Fix |
| “Draw” icon is missing | UI layout or no media added yet | Add any photo first, then check again |
| Press-hold fill does nothing | Wrong brush mode or editor glitch | Switch Pen ↔ Highlighter, force close app |
| Fill covers your photo | Layer order + brush paints on top | Undo, fill first, then add photo sticker |
| Repost background won’t change | Locked auto background | Manual repost workaround or Create mode background |
| Colors look different than friend’s | Feature rollout or device rendering | Update app, test alternate method, use swatch + eyedropper |
| Can’t change after posting | Stories are not editable that way | Recreate a new Story; save template for next time |
| Desktop can’t do it | Limited editor | Use mobile for full Draw/Create tools |
FAQs
On iPhone, open Stories, add a photo or start Create mode, tap Draw (squiggle), pick a color, then press and hold anywhere to fill the screen. If the fill covers your photo, undo and use the highlighter.
On Android, the steps match iPhone: open the Story editor, tap Draw, choose a color, then press and hold to flood-fill the background. If Draw isn’t visible, add any photo first, then try again.
You can change a draft’s background before posting. Open your drafts, select the Story, then use Draw and press-and-hold to fill the canvas, or switch to Create mode for a solid background. Save again.
For link or music Stories, start with Create mode for a clean background, then add the Link or Music sticker on top. If you used Draw fill, place stickers after filling so they stay crisp.
Templates vary by layout, but you can usually change the base color by tapping the background area or color dot, then selecting a new shade. If it’s locked, recreate the look in Create mode and add elements manually.
Use Create mode. Open Stories, select Aa Create, tap the color circle to cycle backgrounds, then add text, stickers, links, or GIFs. For more control, use Draw and press-and-hold to fill.
Fill the background first using Create mode or Draw press-and-hold. Then add stickers, text, and photos afterward so they sit above the color layer. If you filled last, you might paint over everything.
Long-press a color in the palette to open the shade slider and pick a custom tone. For exact brand colors, upload a solid swatch image, then use the eyedropper to sample it.
Create mode is the simplest gradient tool. Open Aa Create, tap the color circle to cycle gradient options, then add your text and stickers. For a custom gradient feel, use a blurred photo plus a translucent tint.
Instagram doesn’t give full ombré controls, so fake it. Start with a gradient in Create mode, then use the highlighter tool lightly on one edge to deepen color. Keep strokes soft so the blend looks natural.
Pick a base color, then use the shade slider to move toward lighter tones. Pastels look best with minimal contrast clutter: one headline, one sticker, one CTA. If text gets lost, add a subtle highlight background.
Use the eyedropper to sample your logo color from an uploaded brand image, then press-and-hold to fill the background. Save that Story as a template for reuse. This keeps your Stories consistent across posts.
Create a blurred backdrop by using a blurred photo or a blurred frame, then add a translucent highlighter tint over it. Place your main photo or text on top. This makes small images feel full-screen and polished.
Tap Draw, choose a brush, pick a color, and press-and-hold on the canvas to fill the entire background. Use the highlighter for translucent color and the pen for solid fills. Undo is your friend.
Highlighter adds a translucent layer, which is great for tinting photos without hiding them. Choose the highlighter, pick a color, then press-and-hold to fill. If it looks too strong, undo and pick a lighter shade.
Instagram rolls out tools unevenly. Update the app, log out and back in, and try again. If you still don’t see it, use the universal fallback: Draw tool plus press-and-hold fill, or Create mode.
Most failures come from brush choice or layer order. Switch brushes, try the pen instead of highlighter, and fill before adding stickers. If it still fails, update Instagram and restart your phone to refresh the editor.
Some share types lock the background layer or behave differently per account. Try Draw press-and-hold after adding the post, or use a manual repost: screenshot the post, upload it as a photo, then fill the background normally.
If your color looks wrong or disappears, it’s usually compression, opacity, or a stuck editor state. Use the pen for solid fills, avoid extremely dark near-black shades, update the app, and export via Save before posting.
Sometimes, yes. Instagram tests features by region, device, and account cohort, not just account type. Business and creator accounts can see different editor options. Use Create mode and Draw fill as your universal workaround.
Yes, but not by editing an existing highlight cover directly. Create a new Story with your chosen background color, save it, then set it as the highlight cover. This is the cleanest way to match brand colors.
Yes. Before posting, tap the three dots or download icon and choose Save. After posting, open the Story and save it again from the Story menu. Saved versions may differ slightly due to compression.
Yes, with layers. Fill one color first, then use stickers, shapes, or brush strokes to add a second color block. For clean designs, use two colors max and keep a clear hierarchy: headline, supporting line, CTA.
Emma blends product marketing and content to turn complex tools into simple, sales-driven playbooks for AI ad creatives and Facebook/Instagram campaigns. You’ll get checklists, bite-size guides, and real results, pulled from thousands of Zeely entrepreneurs, so you can run AI-powered ads confidently, even as a beginner.
Written by: Emma, AI Growth Adviser, Zeely
Reviewed on: January 28, 2026